Community, Work, and the Bounty of the Summer Harvest

Hello Farmers!

August has rolled in and we at the farm are seeing the benefits of all the work we put into our land, enjoying our pickings and looking forward to all the great autumn harvests we know we’ll have this year. Those harvests will be going to the dining hall, to the veggie van, and we will be selling at market on campus again when classes start.

Through all my work with LaFarm, interacting with the Veggies in the Community and other farms, and all my other Lafayette work that has brought me in contact with the Easton Farmers Market, Buy Fresh Buy Local, the Easton Hunger Coalition and others, I have always been most astounded by how much food and agriculture can so easily create a sense of community. Wherever I meet farm workers, farmers, gardeners, food distributors, cooks, or anyone else whose life revolves around food, whether it is at market, them visiting LaFarm, me visiting another farm, at a kitchen or anywhere else, there is always conversation to be had, information to be exchanged, goals to accomplish, and a friendly feeling of being in this life together with a shared purpose. That is one of the main advantages of centering one’s life around such a quintessential part of the human experience, the sense of community we all share.

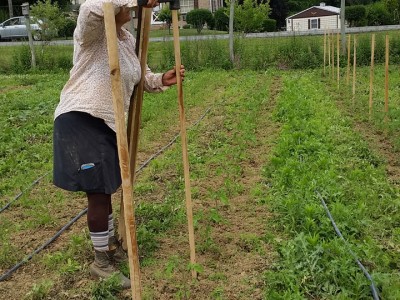
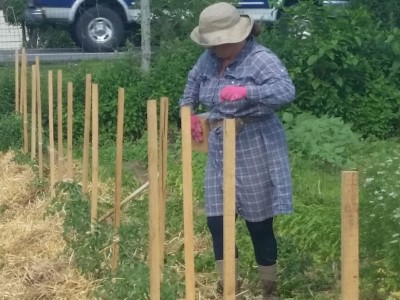
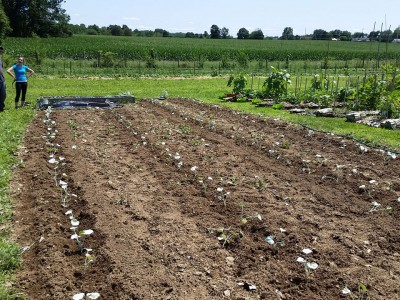
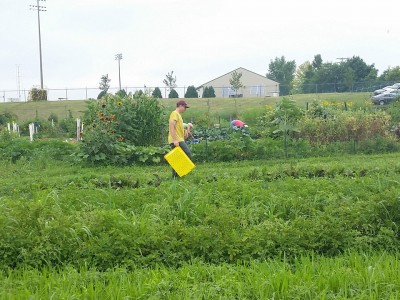
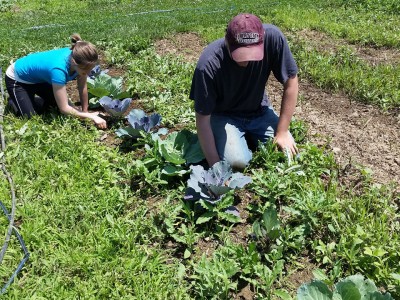
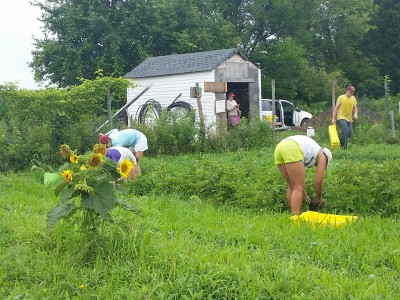
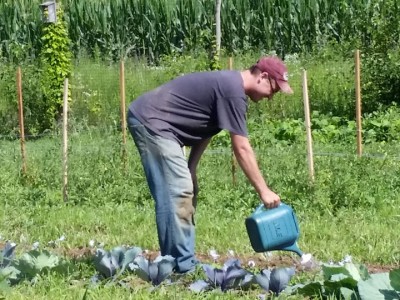
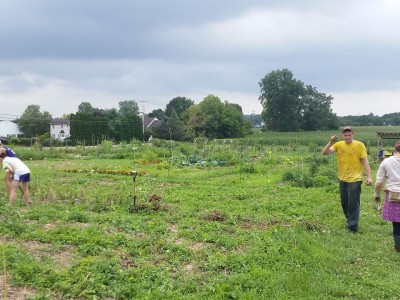
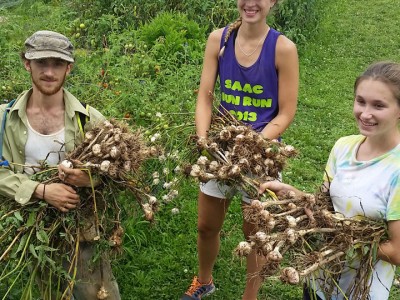
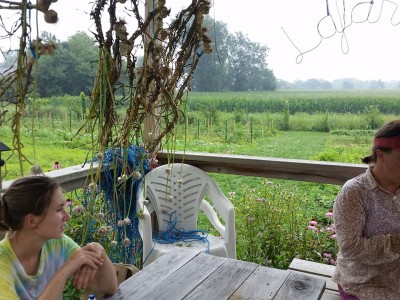
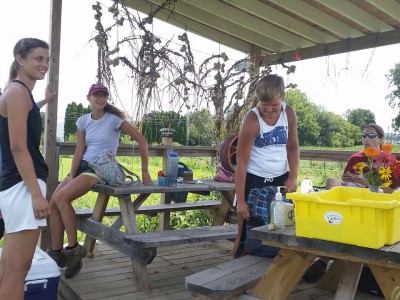
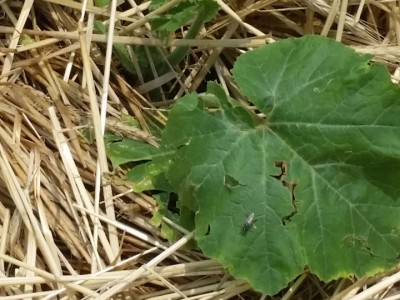
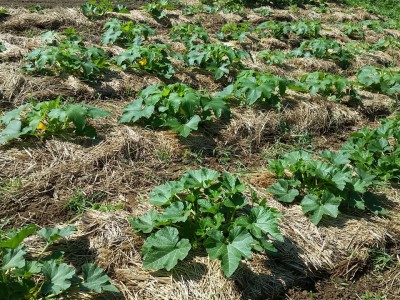
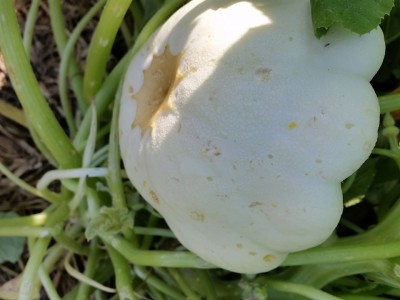
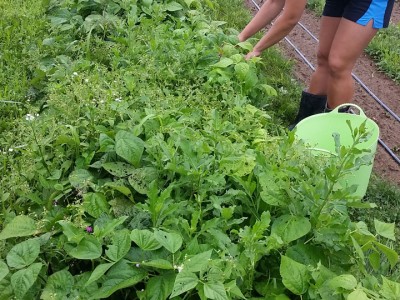
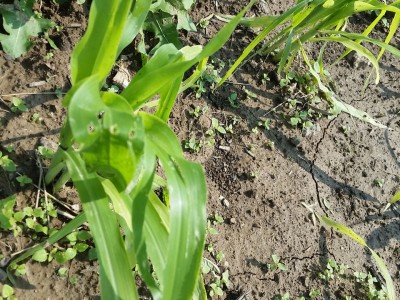
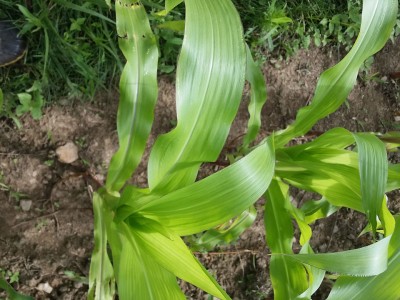
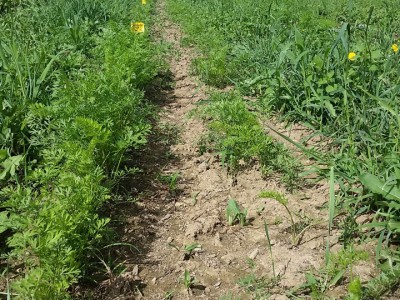
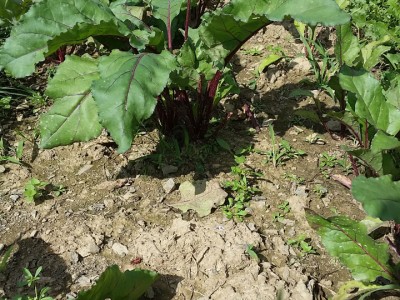
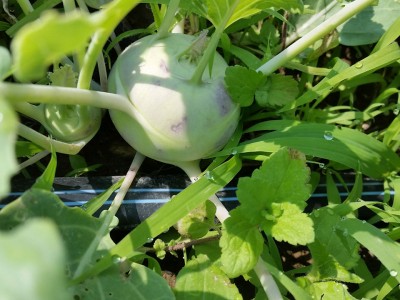
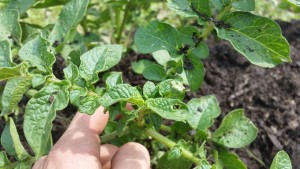
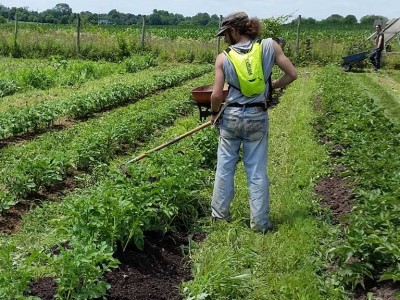
Being in this community has brought me to look back at all the work we’ve done on the farm and take even more pride in what we’ve produced. So I took the time to bring together many of the pictures I’ve taken (and a few that I’ve been in) during this work:

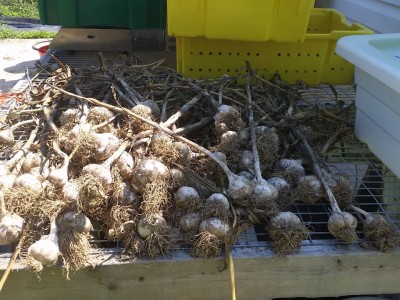
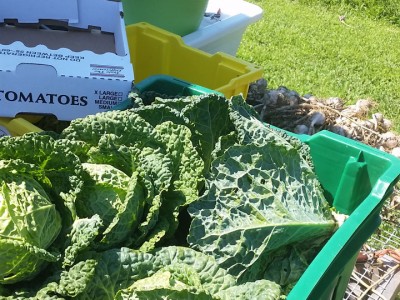
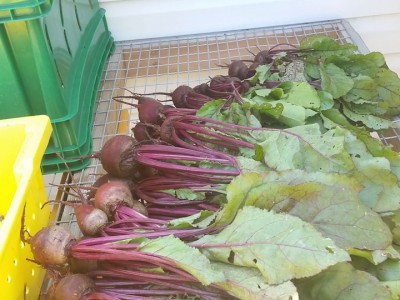
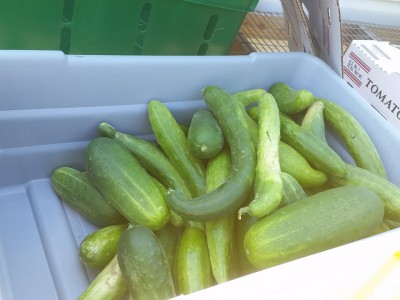
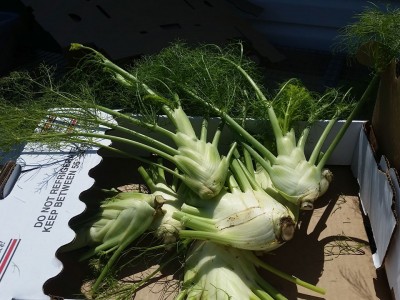
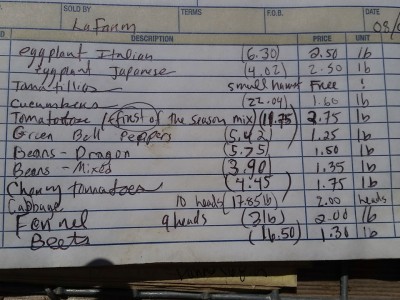
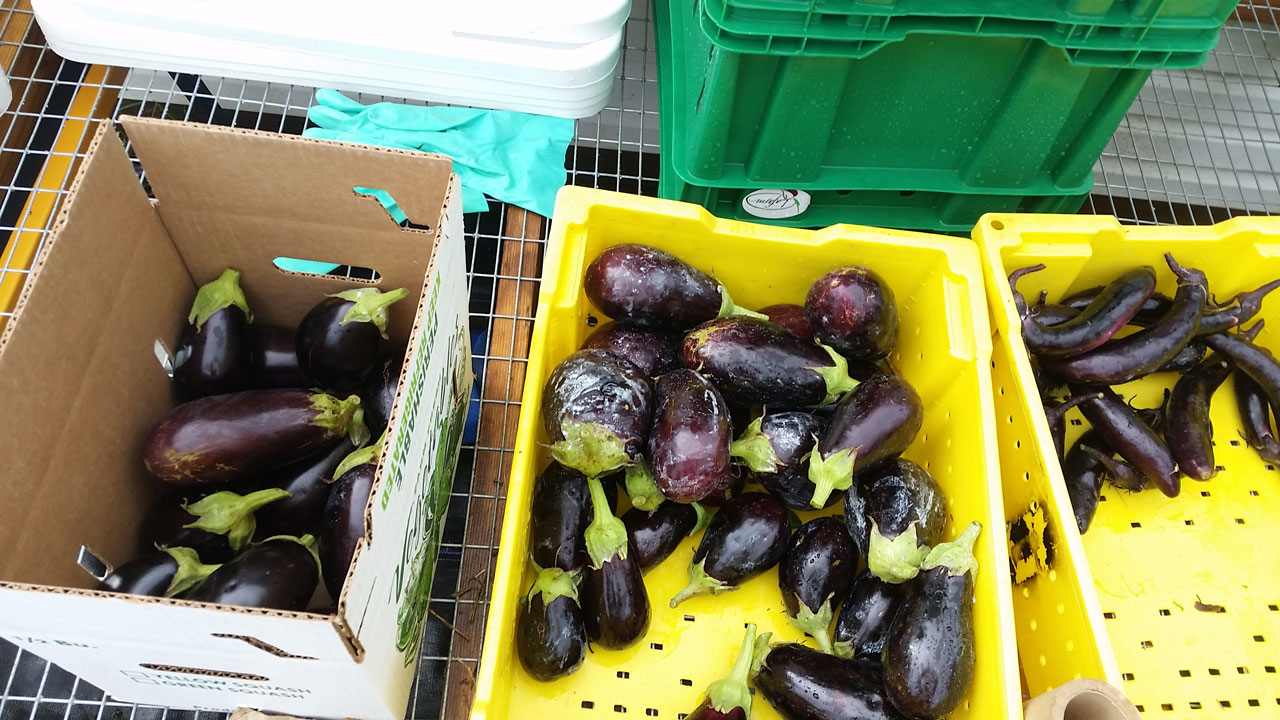
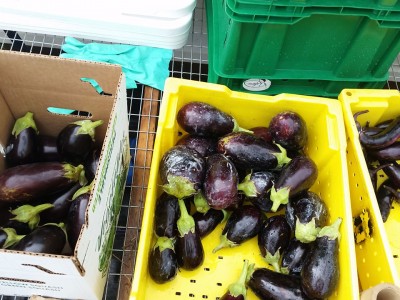
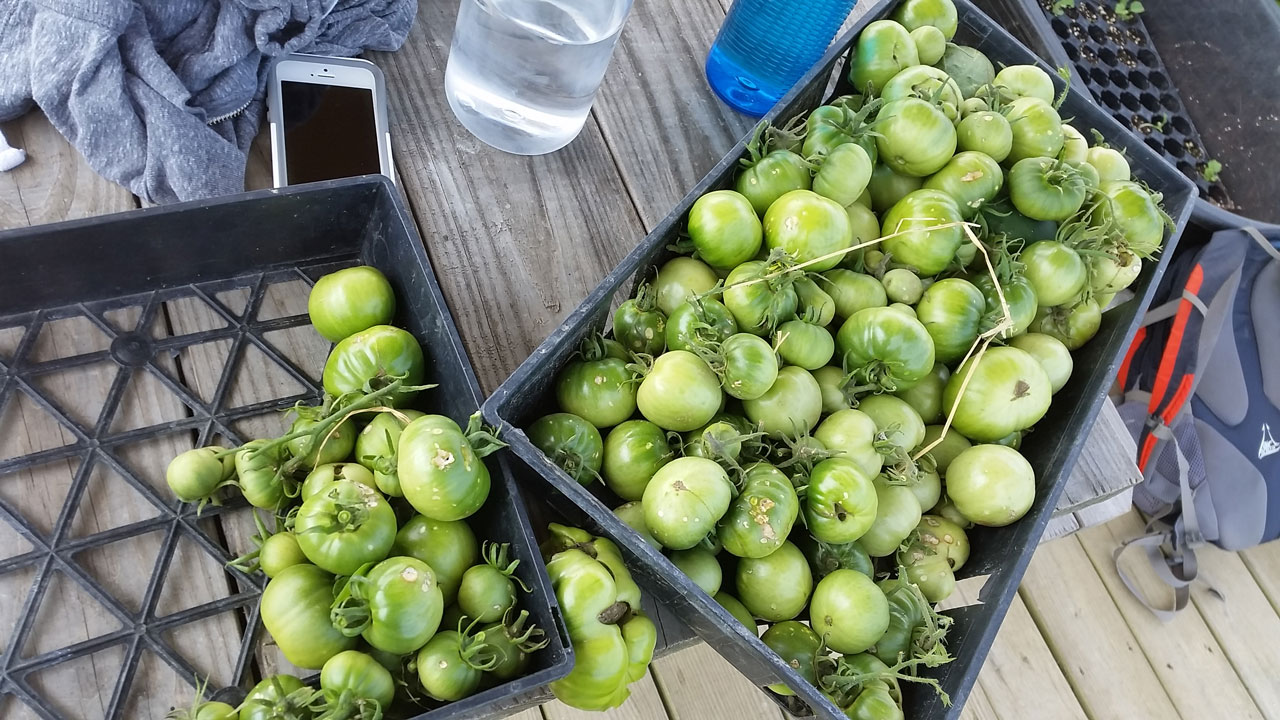
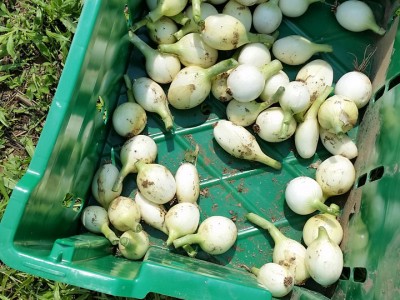
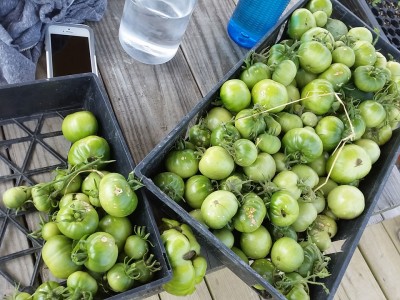
What we all can accomplish together is amazing. look at this harvest from just one day this summer:

From the ground work we have laid this summer, we expect harvests like this once or twice a week for the next few months, albeit with the exact types of vegetables changing a good deal over that time. Out of the rather small chunk of land we have, I definitely find this impressive, and I know that despite our struggles this is all possible because of the many, many hours of hard work that all of the people working or even just helping out once at our modest farm. So many thanks to Peter, Leslie, Miranda, Alexa, Rachel, Haley, Brandon, and all the volunteers and visitors we’ve had this summer, and of course a special thanks to Sarah, without whom none of this would happen, and Profs Lawrence, Cohen, Germanoski, Brandes, and all the others who help make the farm a part of Lafayette! I look forward to another great year as I enter my last Fall semester at Lafayette in this community of food workers.

Joe Ingrao, Summer 2015 EXCEL Scholar

Storm Recovery, One Month Later

That’s right, as I indicated earlier, we are still thinking about and working around the June 30th hail storm and will be actively for the rest of the season at least. After all, I have not had a day working at the farm this month when we didn’t say “we’re doing this because of the storm” at least once, and every conversation I’ve had with a community gardener in that same period has revolved around the phrase “after that storm we…”

Overall, I would definitely say that I am cautiously optimistic about the overall state of the farm given the amount of damage we suffered. This is because despite the amount of damage there was and the fact that we’re still dealing with it, we could be in significantly worse shape had we not dedicated ourselves so highly to storm recovery. For example, I previously said that this event could have shut down a CSA’s season. At this point, I’m confident that if we were a CSA, though we would have lost a few weeks of delivery and would have had to work out the details of potential refunds or partial refunds, we would at this time be able to resume a semi-normal delivery schedule, if with included caveats about what people are not getting due to the storm.

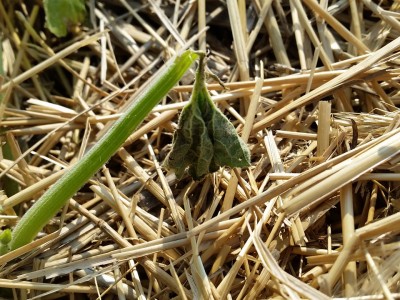
Take for example beans:

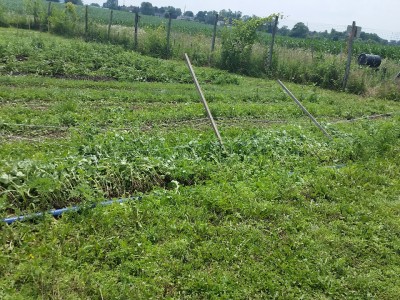
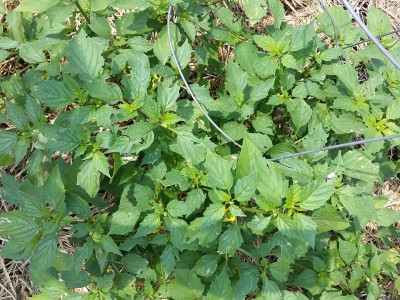
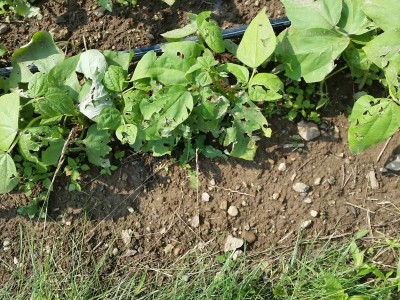
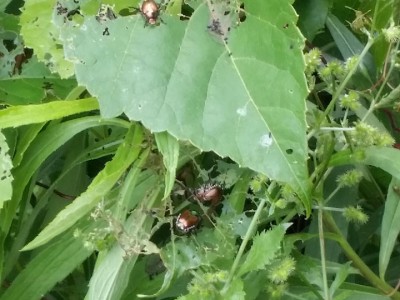
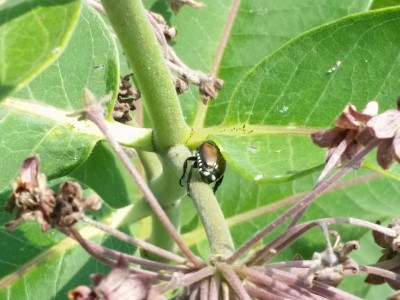
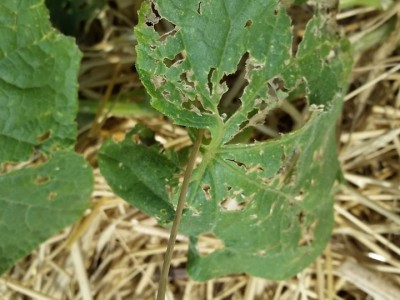
The amount of damage on the beans right after the storm was intimidating to say the least. Many farmers may have just taken those beans and tilled them under the soil, either trying to plant a new succession or just so they didn’t use time and energy on a lost prospect. As we said we would, we left them in the ground and tried to help them out. As can be seen, although they have been hit by the surge of Japanese Beetles that has descended on the farm since the storm, they are still producing. Some individual plants are doing much better than others, but there were more producing plants than not and we had our first harvest of beans just this Monday, July 27th (which is not extremely late for beans by any means.)

This is comparable to the performance of many of our other crops: definitely set back by the damage, but still more or less on time:

Also the plants that  were just sprouting (and thus suffered less from the hail, just on grace of not having been hit) or that we didn’t plant until just after the storm are of course also doing well:

But as I said, this is but cautious optimism. It is impossible to quantify the amount of time, energy, and labor was lost due to the storm. At this time it’s just better to look at the bright side of things; the farm isn’t looking too shabby.

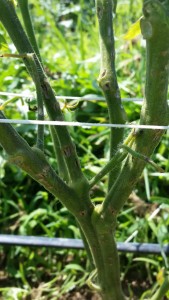
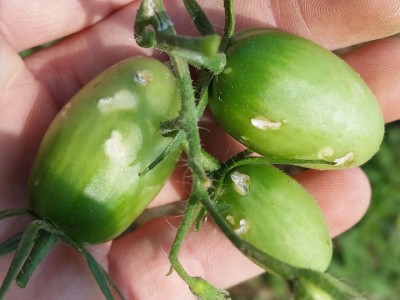
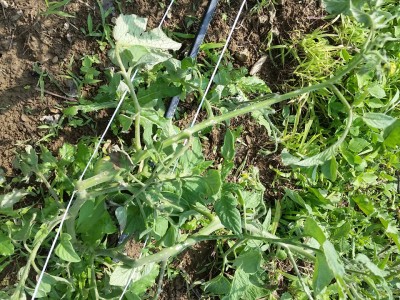
Looking at the stem of the tomato from just last week, you can see how the hail damage has left permanent scars.

Looking at the stem of the tomato from just last week, you can see how the hail damage has left permanent scars.

There is one particularly crop whose damage has hit home for all of us. Our tomatoes. They are producing, and we’ve even gotten some ripe Black Cherries, Purple Cheorkee, and Yellow Perfection, but what we were most worried about happening, happened.

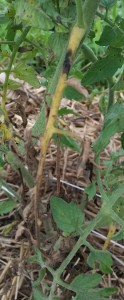
Yellowing and Wilting of a tomato branch most likely caused by early blight

Yellowing and Wilting of a tomato branch most likely caused by early blight

Because of the large number of hail wounds our tomatoes suffered, they became very susceptible to disease and we’ve had to go through our crop several times to clean up the Septoria and Early Tomato Blight, two fungal diseases that necessitate the cutting of dying branches by sanitized clippers. Treating these diseases is important enough to warrant it’s own later technique post, and hopefully within the next week I’ll be able to take some pictures of the process and write that up. Suffice it to say for now that we are at the very least glad that we gave our tomatoes a good amount of spacing (2 ft for a single row between each plant) because good air flow is one of the best defenses against these diseases, and that we have managed to straw mulch under them this season (protecting somewhat against weeds, which make it harder to clean up and of course reduce the room for air circulation.)

And as the previous technique post on spraying Surround is an example of, we’ve incurred some of the financial and labor burden of spraying several of the chemicals recommended by USDA Extension Agent Tianna DuPont to all the hail damaged farms in the area. In addition to that Kaolin Clay, we’ve sprayed with fish emulsion (ground fish essentially, which has many beneficial nutrients plants need and if you spray it on a mature plant’s leaves it can be absorbed into the plant,) as well as Regalia, which is a ‘biofungicide,’ basically a chemical which helps kill bacteria and fungus. Regalia specifically causes in plants what is referred to as ‘Induced Systemic Resistance,’ which basically means it actually stimulates and strengthens a plant’s immune system, so it can better fight off bacteria and fungus. There were a few more chemicals recommended to farmers like us which we elected not to use, and even just what we did get cost us around $800- which is not an insignificant amount of money for a farmer in the wake of a storm which would have drastically reduced their income. Also considering our scale (we didn’t even spray on our full 2 acres) this would have been much much more expensive for a farmer on say, 8 acres who went to spray all the different recommended chemicals. At the moment, we’re just very thankful that what we’ve done has been as successful as it has, even if not everything is perfect. Hopefully we’ll be able to completely recover from our remaining problems by the end of summer.

In the mean time, hope everyone is doing well, and happy farming!

-Joe Ingrao, Summer 2015 EXCEL Scholar

Kaolin Clay

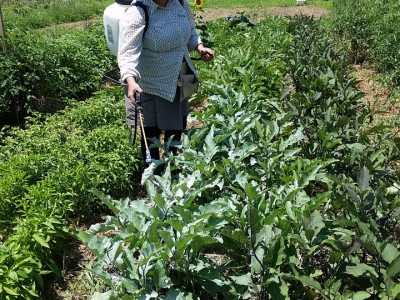
There aren’t many things that we spray at LaFarm. But in the wake of the storm it is more important than usual for us to do everything we can to protect our plants from any further damage. That’s why right now, when the worst of the pests are around, we’re protecting our most vulnerable crops with Kaolin Clay.

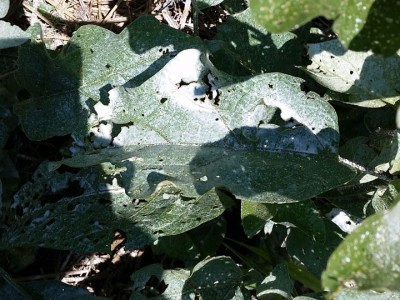
Kaolin Clay is a completely organic substance, it is in fact a finely ground clay powder. When mixed with water, Kaolin Clay can be sprayed on plants to coat them in this powder, which (with an effectiveness that surprised me) confuses pests, who confusedly find that instead of a tasty eggplant leaf, they’ve landed on a weird clay bush. This way, it doesn’t actually kill anything or disrupt the ecosystem, it just protects the plants you spray it on.

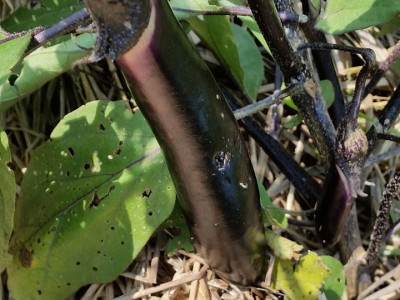
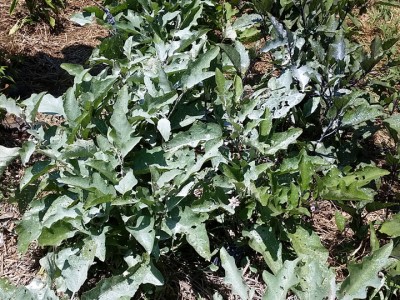
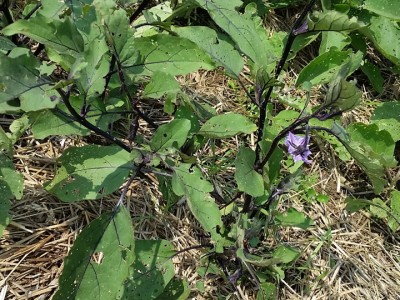
Kaolin Clay is not completely effective for all plants against all pests, but it’s definitely effective enough that we spray our squash (especially young transplants) to protect against cucumber beetles or squash bugs, our eggplant to protect against flea beetles, Colorado potato beetles or anything else that might want a munch on them, and on a few others like Brussels Sprouts.

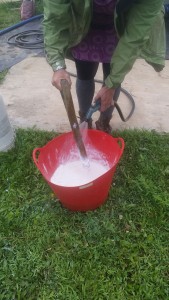
Stirring Kaolin Clay solution with the broken handle of an old digging fork.

Stirring Kaolin Clay solution with the broken handle of an old digging fork.

To use Kaolin Clay, you first need to mix it with water. We go for the Surround brand Kaolin Clay, which calls for 3 cups of Clay to be mixed with every 1 gallon of water. We put the Clay in a bucket and then add water and stir until the Clay is mixed enough that it doesn’t stick to the bucket or whatever we use to stir. Also at this step it’s safest to wear something over your nose and mouth; although the clay is not toxic, you still don’t want powdered clay getting in your lungs.

It is most advisable to spray on days without direct sunlight. When the liquid pools on a plant, it can magnify sunlight, which can burn the plant, making it less healthy, defeating the purpose of spraying. At the same time, you do not want to spray if it’s going to rain soon. Rain can wash off the clay, especially if it’s been applied only recently.

We use a hand-pumped backpack sprayer, dumping in the mixture from the bucket once it’s ready. It’s theoretically possible to spray it from a smaller spray bottle if you only needed enough for a plant or two. Some farmers will mix fish emulsion into the clay (fish emulsion can soak into the leaves of mature plants, giving them additional nutrients) but this is not advised by the USDA. It’s important to spray every leaf of any plant you’re trying to protect, and both the tops and bottoms of each leaf. Otherwise it would be like building a wall around half of a town to protect against invasion: it won’t help when they come from the other side.

After spraying, most pests will be confused by the clay and not eat your plants. That is especially important if you have hail- and flea beetle-damaged crops like our eggplant, or if you’re about to transplant 50 zucchini when you’ve noticed some cucumber beetles around the farm.

Happy Farming!

-Joe Ingrao, Summer 2015 EXCEL Scholar

Cover Cropping

This post comes at a very good time as the National Working Group on Cover Crops and Soil Health recently released a top ten list of ways to improve soil health. So, since these are some of the things we’re doing out at LaFarm, it makes sense to share some basics about cover cropping.

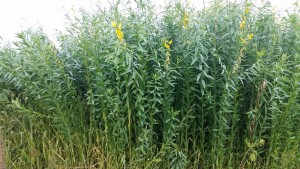
Last year we covered a 40'x40' plot with sun hemp. Sun hemp fixes nitrogen in the soil, can be used as cloth, and is very effective at shading out weeds (also you cannot smoke it.)

Last year we covered a 40’x40′ plot with sun hemp. Sun hemp fixes nitrogen in the soil, can be used as cloth, and is very effective at shading out weeds (also you cannot smoke it.)

Cover cropping is the act of purposefully planting a non-food crop on your land for one of a few reasons. You can use leguminous cover crops to increase nitrogen in the soil (or a whole host of other crops to increase organic matter or specific micro-nutrients) to protect a plot, bed, or field from weeds before or after you’ve used it for food in a season, to mark permanent walking paths between permanent beds, or even sow a crop that doesn’t grow tall under a food crop to shade out weeds so you don’t need to weed under your taller plants.

One of the main differences between cover cropping and just growing buckwheat, sun hemp, or any of the other numerous plants commonly used as cover is that generally you’re not planning on using the product of the crop, but instead are planning on tilling it under before the next season or composting it to increase soil fertility-though that’s not necessarily the case. You can grow oats as a cover, hand-harvest the oats and then still till under the crop. Likewise we could have harvested the sun hemp we grew as cover last year to use as fiber for clothes and left the leguminous nitrogen nodules in the ground for this season. But the main goal with cover cropping is the soil health benefits, not the produce of the crop.

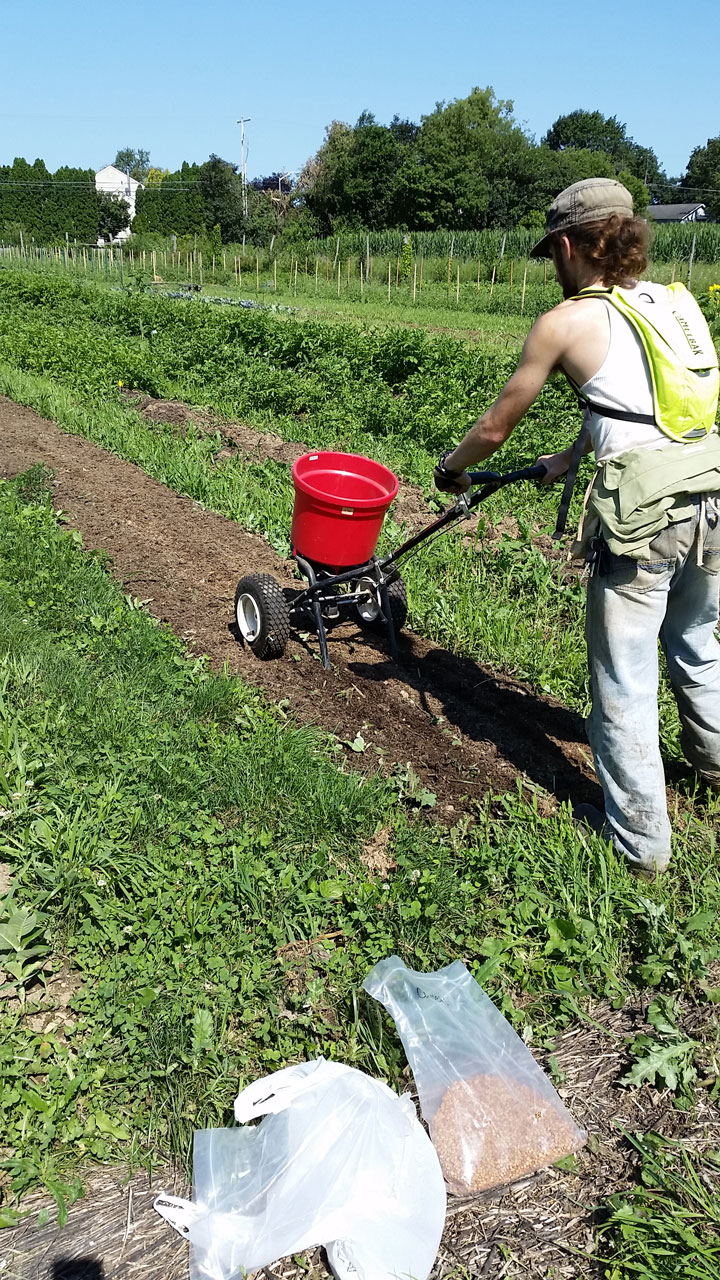
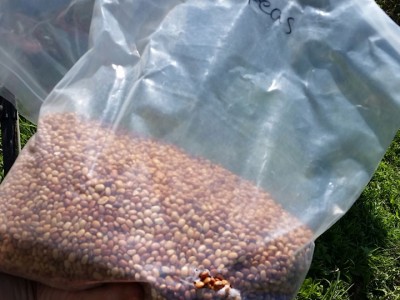
As I’ve mentioned previously we had to pull a whole row of potatoes after the storm on June 30th. Because there’s a good deal of growing time left, we decided to cover crop it with cowpeas and buckwheat. We chose these because cowpeas fix nitrogen in the soil, and the buckwheat will live for longer into the winter, keeping protection on the bed, but both will die before next season, so we can till them under for increased soil nitrogen and organic matter. This handy guide by the USDA is a great quick reference for what kind of cover crop you may need.

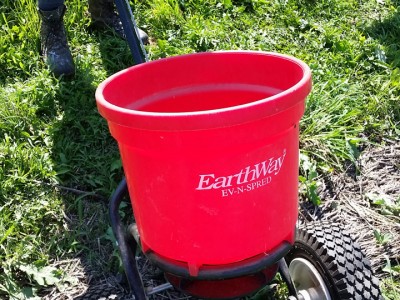
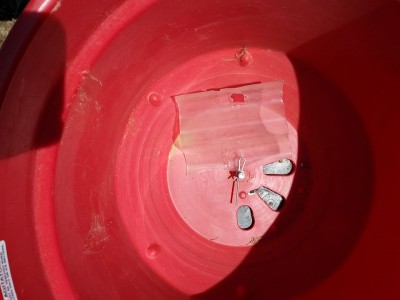
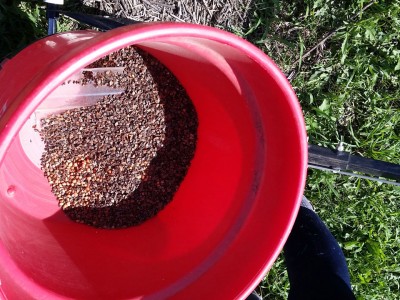
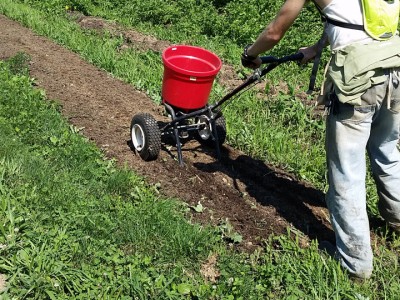
We started by tilling the bed, and then getting out our Earthways Broadcast Seeder. When broadcast seeding, you can spread by hand, it just takes a lot of time on any significant scale. We filled the seeder with the cowpea and buckwheat seeds, and then walked it across the newly tilled row. With cover crops, soil compaction over the seed is actually desirable (unlike with vegetables where it is to be absolutely avoided.) After just one pass with the seeder, we used a soil rake to cover all the seed. It was that simple! And since we’re not harvesting this crop for food, we don’t need to pay any more attention to the bed really (except for some optional hand weeding if weeds start getting too big before the peas or wheat get established.)

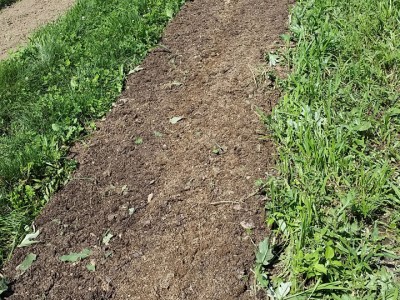
This was just on on a single row. At the farm, we’ve also cover cropped all our permanent pathways with crimson clover, which doesn’t grow very tall, shades out most weeds, and marks the areas we can walk on, and we’ve covered whole plots with buckwheat, Sudan grass, sun hemp and other crops. For that, you just till the whole plot, broadcast seed until you see seed over most of the area of the plot, and then step all over it and/or rake it into the ground. Some farmers tie wooden boards to their feet to help step on the whole area faster.

Hope this helps some diversified growers out there!

-Joe Ingrao, Summer 2015 EXCEL Scholar

Natural Disasters, Resiliency, and Agriculture

Hey Farmers,

The storm now weeks past brings to light a lot of issues that are becoming increasingly salient for people around the globe. As an educational establishment, standing with one foot in agriculture and the other in academia, we at LaFarm study the broader food and agriculture system and its interconnectedness with human society as well as the rest of the world beyond humans. Therefore, it is necessary to discuss the ripple effect of non-human events (natural disasters, even small ones) through this indelible network of human and non-human processes.

This storm was not actually too huge. It’s definitely not the biggest storm that’s hit this area in the few years I’ve been here (as we should not forget hurricanes Sandy and Irene.) And yet the damage it did to us was devastating. As I said in my last post, this storm could have easily ended a young farmer’s career. The localized hail and wind damage alone took a good percentage of our overall yield away, and the cost of dealing with the ramifications is high enough to make a farm dip far into the red.

So consider farms at our scale. Very small, very local. Other such farmers could sell to a local market, run a CSA with a few dozen shares maybe, or a combination of both. Even a minor natural disaster, one where no person was too seriously injured, maybe one downed power line or already is having a huge effect on these people. The farm gets hit hard, the farmer and their family is out of a job, and could lose the land. CSA members may get a refund, or maybe the farmer can’t even get that money back to them. Thousands of dollars are lost or turned into debt, and a lot of families’ economic situations are complicated. A market gardener loses supply and the market doesn’t make them money any more, they lose customer loyalty and even if they somehow make it back to the market next year, they now have a harder time competing. Think about this happening to an area that’s close to a food desert. Imagine the families buying fresh vegetables from the market on SNAP benefits, or who rely on their local urban farm who might not be able to get produce from anywhere else around. So there’s hits in the health and stability of families as well.

Now think about the problem scaled up. Imagine a mid-scale producer being hit with a bad storm or an awful flood. If they sell wholescale to the local hospital or school, there’s going to be a lot of economic disruption for years to come, not to mention the potential for a food shortage. And then a large farm being hit with a bad hurricane, tornado, earthquake, or drought (I’m thinking out west right now.) The potential ramifications will have effects on thousands of people easily.

So given that storms and other natural disasters are going to get worse from here on out, what can help the food system become more resilient against the potential of natural disasters? Well, a lot of things:

  1. Local food networks. Say you’re the administrator of a hospital, looking at where to source your food. If you buy all of your food cheap from mono-croppers halfway across the country, and any one of the few farms you source from gets hit, that’s potentially catastrophic. But, if you source from 20 different farms within 100 or 200 miles of the hospital in any given direction, than one single event can’t completely disrupt your food supply.
  2. Grassroots support organizations. With farmers helping each other, CSA members who are willing to come help after a storm or flood, a co-op designed to support its member farms, or a myriad of other possible formal or informal partnerships, every producer benefits in their time of need.
  3. More diversified growers. If you run an just orchard, a hail storm can destroy a whole year’s crop, if you grow only annual vegetables, a bad flood could wipe away your whole farm. But only the worst flood could carry away an established nut or fruit tree and hail can’t annihilate forage crops grown in the understory of a food forest.
  4. Better policy support for small, diversified farmers. Large mono-croppers can get some form of crop insurance, but diversified growers cannot. There’s plenty of subsidies for conventional corn growers, but not so much as an assistance program for diversified organic growers. We need policies in this country (and in other countries as well) that can support the sort of system we need to be sustainable.

In addition with the slow plodding push for that sort of change, already started by others, individual farmers can prepare themselves in several ways:

  1. Educate yourself about how to deal with damage due to natural disasters. Look for webinars, ask your USDA extension agent, or learn from other farmers.
  2. Form partnerships with other farmers. Tool lending libraries, co-ops, and even just friendships with other farmers in your area will help you and them be prepared with both the knowledge and skills necessary for when disaster strikes. In addition, if everyone helps each other become established, everyone will already be in a better place when something does happen.
  3. Educate your customers about agriculture’s relationship with natural disasters, and society in general. This will make everyone a better ecological citizen, who may be more likely to be understanding and not need a refund for part of a CSA share lost to drought, or pay extra for your remaining produce at the stand after a storm.

There’s a lot of work to be done to make our food system sustainable in the face of a climate-change stricken world

Documenting Damage

Hey Farmers,

So we’re going to continue with the sad storm news. Although it has been two weeks since the storm, that does not mean the damage is no longer affecting us. This storm will have an impact on what happens on the farm for the rest of the season. In the overall scheme of things it will have even further reaching impacts, and I’m going to dedicate a full post later to discussing that. For now, I’m going to catalog and analyze the damage in as much detail as I can based on my experiences and what Sarah and our USDA extension agent Tianna DuPont say about it.


Walking out on the farm on Wednesday, already a day after the storm, I was astounded by how much had been done. On campus, we had just been told to stay inside for half an hour as the worst of the storm passed, and the amount damage that happened to the farm in that little time left me speechless. On Wednesday and Thursday, I spent over an hour just walking the field, taking pictures and notes on all the damage, afterward talking to Sarah about what the damage would mean.

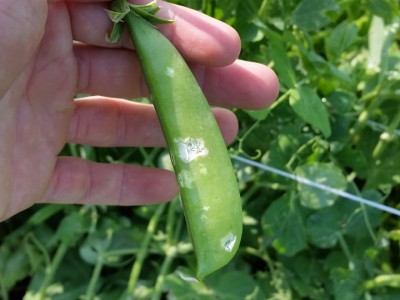
Some of the impact is obvious. The first thing through the gate of LaFarm, our onions, fall into this category, as do all our peas and a fourth of our potatoes. This damage is pretty obvious: destroyed plants can’t finish their life cycles. For our peas, the damage was absolute: broken stakes and hail damaged pea pods mean the last week or two of pea harvest was no longer feasible. Even what was on the vine wasn’t even safe to give away; hail damage to the peas would mean they would probably rot on the vine, none of it would keep long enough to be eaten. This led to hours and hours of work pulling the plants, stakes, and trellises when previously that work was going to help establish other crops. As for onions and potatoes, we could salvage what was there but a good amount of potential was lost. Our onions would have grown a significant amount more in the next several weeks, but we needed to rush to harvest and cure every onion in our northern most plot. Of our four rows of potatoes, the oldest, northernmost row acted as a wind break for the other three, but was devastated in the process. We harvested that whole row of potatoes that day and sent them to Chef John on campus, who luckily needed them that day.

Most of the rest of the damage was less obvious, and will require more work to overcome in the long run. With these peas, onions, and potatoes, we just had to salvage what we could and rip the rest. For many of our grown but not yet producing crops, we’ll be nursing them to health for the rest of the season. USDA Extension Agent Tianna DuPont recommended to us and the other organic farms hit by the damage 5 different organic chemical treatments, plant steroids and the like, to help remediate the damage. This damage is also more uncertain in its impact. We know roughly how much we lost in time and food between the above crops, but since our other plants are still in the middle of their lives, we’ll never know for sure how much this storm took out of them. And this insidious damage comes in two degrees as well: the first is the direct damage. Trellis cages blown away, hail holes in leaves and vegetables, broken branches and stems, etc.

The second is much more indirect, and more long lasting. Healthy plants are more resilient against pests and diseases. This is obvious even on our scale with potatoes and eggplants: this year we composted our potatoes, and even though there are Colorado Potato Beetles around, we have hardly seen a lick of damage on them compared to last year when we didn’t compost them; our eggplants went in the ground this year before a long hot period without any rain, and were unhealthy, soon they were devastated by flea beetles. So now all of our plants are hurt, and spending their energy on trying to heal. This means they have less energy to fend off blights and beetles. It’s no coincidence that Wednesday, the day after the storm, was the first day Fletcher, Peter and I remember seeing Japanese Beetles in such huge numbers around the farm. And with early blight hitting many tomatoes in the area, we’re on the lookout and have been pruning like crazy.

This is where the damage is obviously far reaching, even if only considering LaFarm. A bad pest and disease year means for years to come we’ll have to fight back against further pest and disease damage. As Sarah put it, the storm hitting the farm is like someone training for a marathon getting in a car accident: they’re going to be spending a lot of time dealing with their injuries and probably won’t be able to finish their training before the marathon, and those injuries could hurt for years. For a starting farmer, the amount of lost money and required additional work and investment this sort of storm event caused us, this could mark the end of a career, and the loss of a farm. A CSA may have to cancel most of a season and probably need to supply refunds of money they already spent, a market gardener would lose thousands of dollars of income between direct and indirect losses. And this has a lot of implications on the broader food system, which I’ll be writing about at length in my next post.

– Joe Ingrao, Summer 2015 EXCEL Scholar

Staking and Trellising Tomatoes

Hello Farmers and Gardeners!

Some say that tomatoes are groundvines, meant to crawl all over the place. But tomatoes on the ground yield less, cannot get weeded, and in our region get all sorts of diseases from their leaves being in contact with wet soil. So although there may be proof that tomatoes evolved to be groundvines (the way that the stems will grow roots if they’re in contact with soil for example,) as stewards of human-controlled ecosystems we need to recognize that in the context of modern American farms and gardens, it’s best to trellis tomatoes.
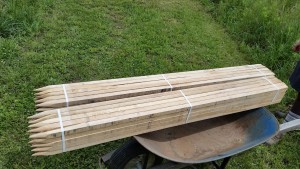
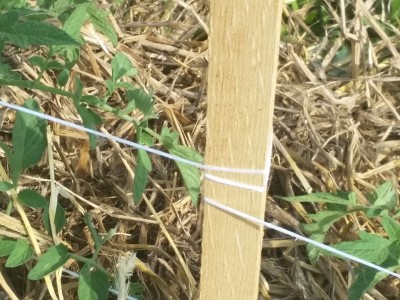
Our 5' wooden stakes. In retrospect, we should have bought 6'

Our 5′ wooden stakes. In retrospect, we should have bought 6′

There are many ways to trellis tomatoes–trellising is just the process of giving the tomatoes a structure to keep them upright, and I can think of a million ways to do that. Gardeners can get pretty creative with their trellis work if they only have to take care of 10 or so plants (or use nice, reusable metal tomato cages for a simpler path,) but with upwards of 700 row feet of tomatoes on the farm we have to use efficient, scale-able trellising techniques. Even this way there’s a lot to consider, especially as an organic farm.

Generally, you need stakes for any large row of tomatoes, and right there are a few variables. Stakes come in different lengths for different purposes, so you might want longer or shorter stakes for large or small tomato varieties. Then there’s the material to think about. Wooden stakes are much cheaper, but until recently there was no organic approved cleaner that a farm could use to soak them so they would be safe to use for more than one year (as wood is notorious for soaking up pathogens,) and even then it’s a lot more work (and outside resource input!) to reuse wooden stakes than the alternative: metal stakes. Metal stakes though, are more expensive, heavier, and generally more difficult to put in and take out of the ground. At the same time, they are easy to clean, durable, can be reused for many years, and run almost no risk of snapping during the staking process. On the farm, we have a broad collection of metal stakes of various lengths, and many wooden stakes. Some years we use a combination of both on each row, putting the metal stakes at the end and in the middle of each row to give strong anchors to our trellising; this year we used all wood stakes on several rows and all metal ones in another, and placed metal wire cages around some tomatoes in short rows we had.

Supposing you’ve decided on your stakes, then there’s still the decision of what to use between the stakes for the actual trellis. Most methods require some kind of sting or twine made of something like cotton (which is biodegradable, but not very strong) or some polymer (which will be in a landfill for a long time, but is very strong.) Again, we used a
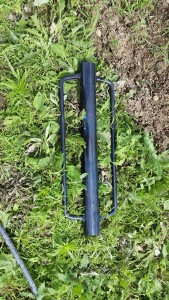
Our 20+lb stake driver

Our 20+lb stake driver

combination of different choices on various portions of our tomatoes. For many of our tomatoes we used a twine to do a Florida Weave which is a complicated technique to describe on its own. For a specific bed where we planted 2 rows, we used a completely different technique involving metal wire.

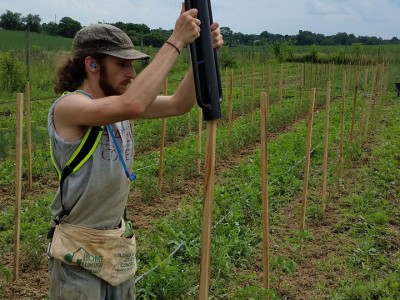
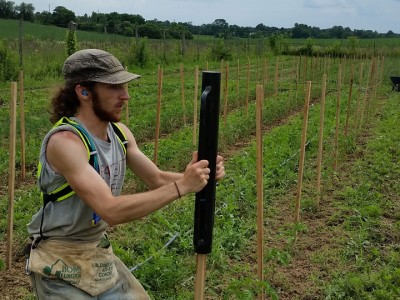
We’ll get back to that though. Before your do any trellising, you have to stake. In order to stake, you’ll need your chosen stakes, something like a mallet to begin getting them into the ground, and something to drive them with. This year, we have a nice powerful stake driver for that job, but it’s possible to use the capped end of a pipe (very, very securely capped) or even a sledgehammer if you’re desperate.

One person with a mallet goes along the row with the stakes and places them upright at the correct spacing. It’s important to make them upright or the tomatoes will follow the leaning, and the correct spacing depends on how close your plants are, how many stakes you have, and how you’re going to trellis them. We go every 2-3 plants, 2 on our rows with 2 ft spacing and 3 on our rows with 1.5 ft spacing for our Florida Weave, and we went every 3rd plant for our metal wire method. The leading person uses the mallet to get the stake somewhat in place, and then a person follows with the stake driver to really get them into the ground (I made sure to wear ear plugs for this part because the stake driver makes sharp, very loud dings.) Metal stakes usually have a little t-bar that should be buried, and wooden stakes should just go into the ground by at least a foot or two (which you should take into account when purchasing!)

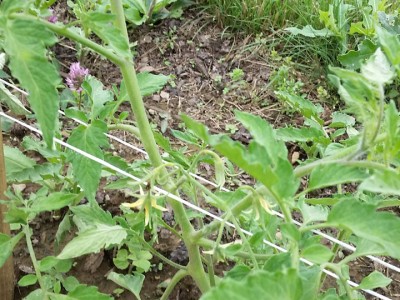
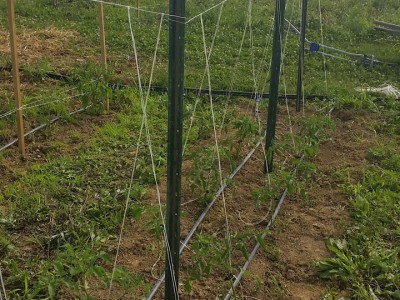
Then it’s time to trellis. Florida Weaving involves a box of twine and potentially a short piece of PVC pipe to help guide the twine. For each of your newly staked rows, you take your twine and run it in a horizontal line about 1 foot off the ground, circling it very tightly around each stake and keeping the twine taught, and then back the other way at the same height, tying each piece off at the ends. You take your tomatoes and tuck them between the lines of twine, and do it again a foot higher when the tomatoes grow taller.

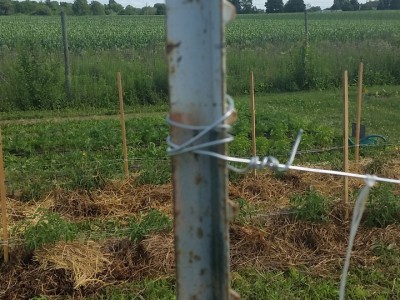
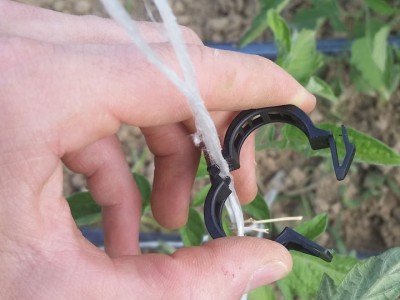
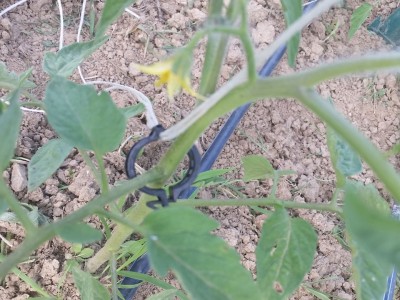
Or there’s our metal wire method. I like this way a bit better, and it actually gave us a use for some previously used polymer twine we had saved. It does require metal stakes though, because of the tension required. For this you take a roll of metal wire and run it along the tops of the stakes, wrapping it very tightly around each to make sure it’s very taught, and occasionally tying it off to increase loss in tension from overly-long lengths of wire. You want the wire so tight that you’re actually pulling the tops of the stakes toward each other every time you tie one. Once you have metal wire over the full row, you take some twine and tie a double length of it over each plant. This means you take a length of twine that goes from the wire to the ground, double it, and loop it around the metal wire so both ends get down to the ground. Then you take black tomato clips (which can be washed and reused, but sometimes break over the course of a season,) and clip each plant into the twine. Some plants that have multiple main stems will need a clip on each one (with one end of the double length of wire in each clip.) And as your tomatoes get taller, you only need to take more clips and add them higher up on the plants.

That is one of the most important job on any farm that grows a good number of tomatoes. There are many more methods than those in this post, you can tell us about your favorite in the comments!

-Joe Ingrao, Summer 2015 Excel Scholar
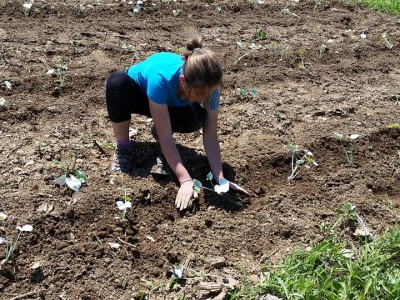
Compost Hilling Potatoes

June 24th 2015

Hello Farmers and Gardeners!

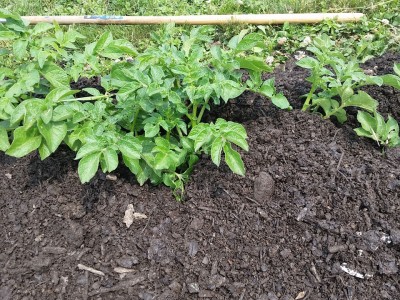
A row of potatoes, pre-hilling

A row of potatoes, pre-hilling

Done-Job

The same row of potatoes, post-hilling

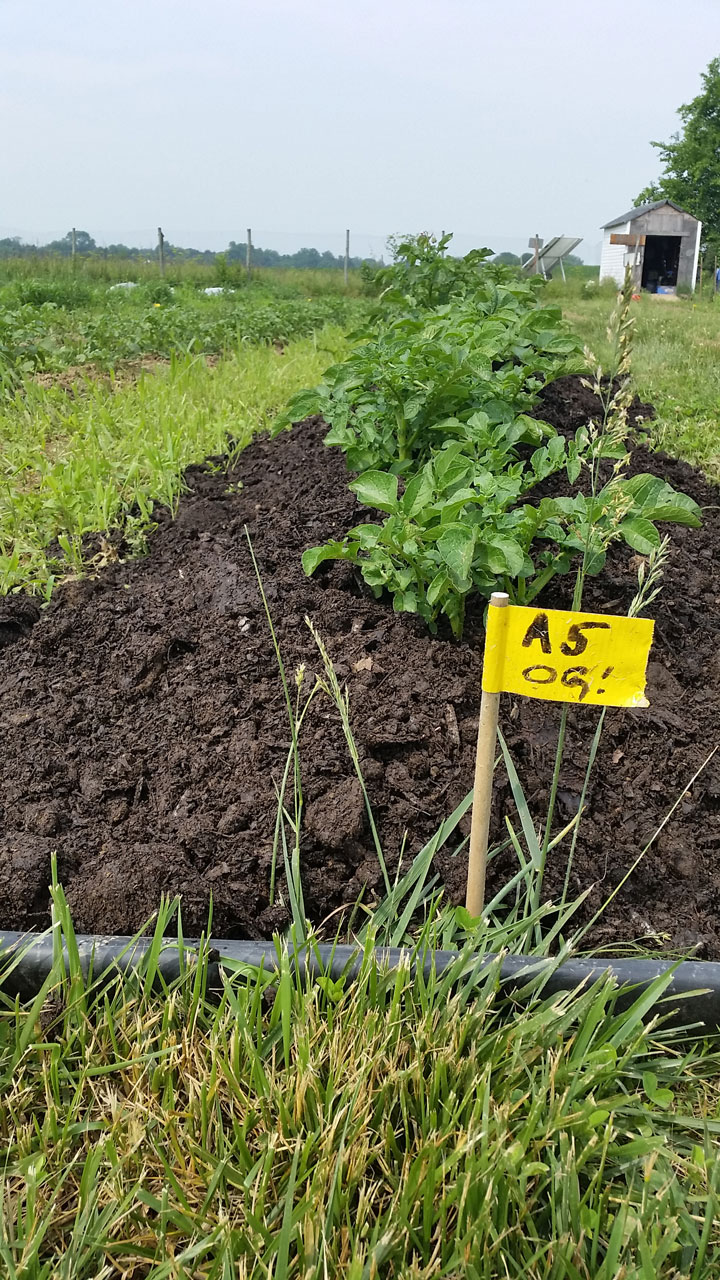
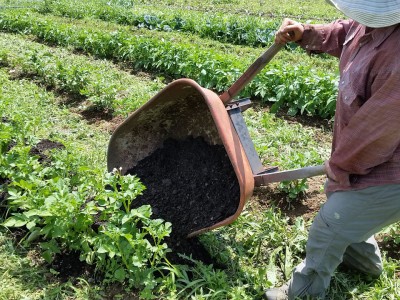
So last year I made a post about hilling potatoes. Hilling potatoes yields more potatoes per plant, keeps weeds down so less weeding, and stops the potatoes from widening and getting all over the place, tricking them into growing higher instead. So hilling is advantageous for many reasons, but there are many ways to do it. My last post about it just involved using dirt. We’ve also used straw and compost to hill, and they are very different techniques. As you may have guessed from the title, this year we’ve been hilling with compost, and that’s what I want to explain in this post.

For this you’ll need a flat hoe, a wheelbarrow, a shovel, and compost (obviously.) Once your potatoes have grown up a foot or so, you can hill them, we’ve been hilling our potatoes that went in the ground in late April for the last 3 or so weeks, so most potatoes don’t require much more than a month or so of growing. We always do make sure to weed each row of potatoes right before we mulch them this way, and we mow the paths between the rows to make it easier for us as well.

The growing point-or the place where the stem will continue rising, is at the convergence of the highest set of branches on any plant, right here on potatoes. This is the part that it's important to never block from the sun.

The growing point, which is the place where the stem will continue rising, is at the convergence of the highest set of branches on any plant, right here on potatoes. This is the part that it’s important to never block from the sun.

First thing you do is fill a wheelbarrow with compost, and dump it right next to your potatoes. It’s ok if it get’s right on the plants, as that is the point of hilling them. Once your potatoes are nice and strong, you can pile the compost 6-8 inches or higher, as long as you don’t cover the growing point on each plant (pictured.) After you’ve poured it on, you can take your flat hoe and kind of rake the compost into place, covering the bottom branches of each plant as best you can.

After that, you leave the potatoes as they are. They will grow up very happily and yield many delicious spuds for you. Happy Farming!

– Joe Ingrao, Summer 2015 EXCEL Scholar
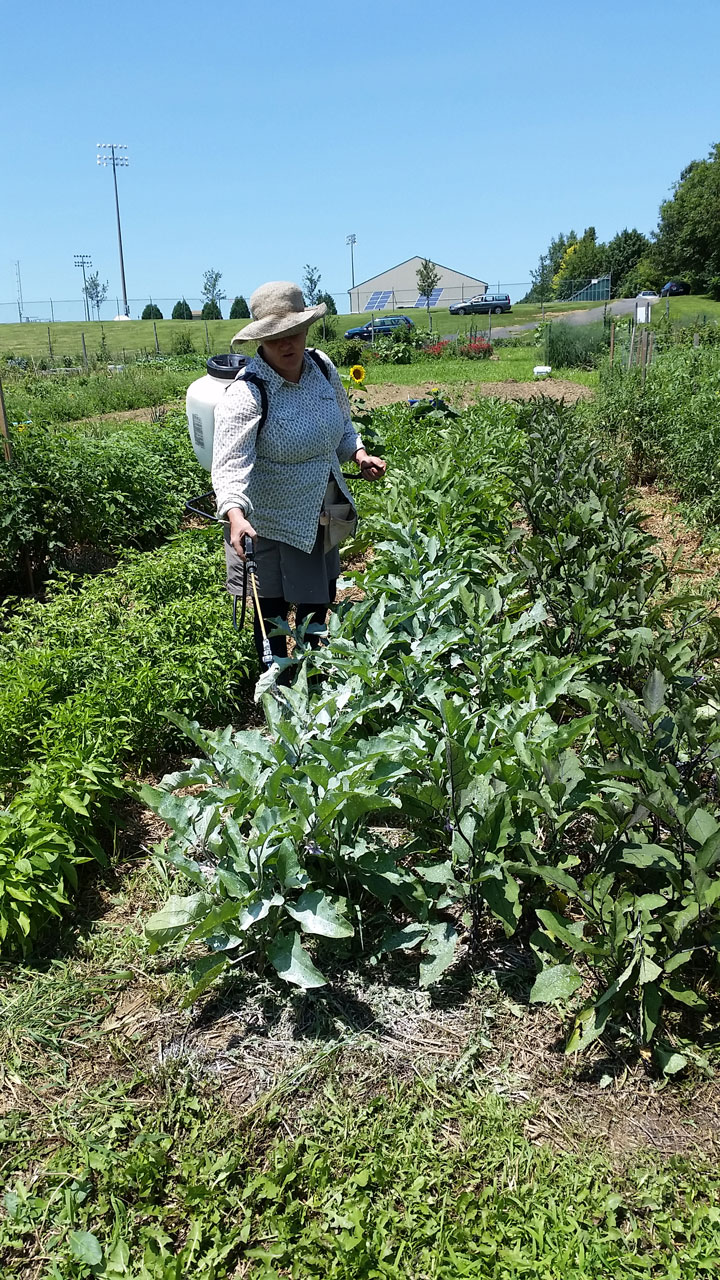
Direct Seeding Beans

June 17th 2015

Hello farmers out there! I’m back to LaFarm for another summer, and have had my hands in the dirt quite a bit already. To best capture the spirit of the season (a very goal-oriented, don’t-stop-working-all-day-and-there’ll-be-plenty-of-work-left-anyway spirit,) I’m going to be writing about a season appropriate topic: planting beans!

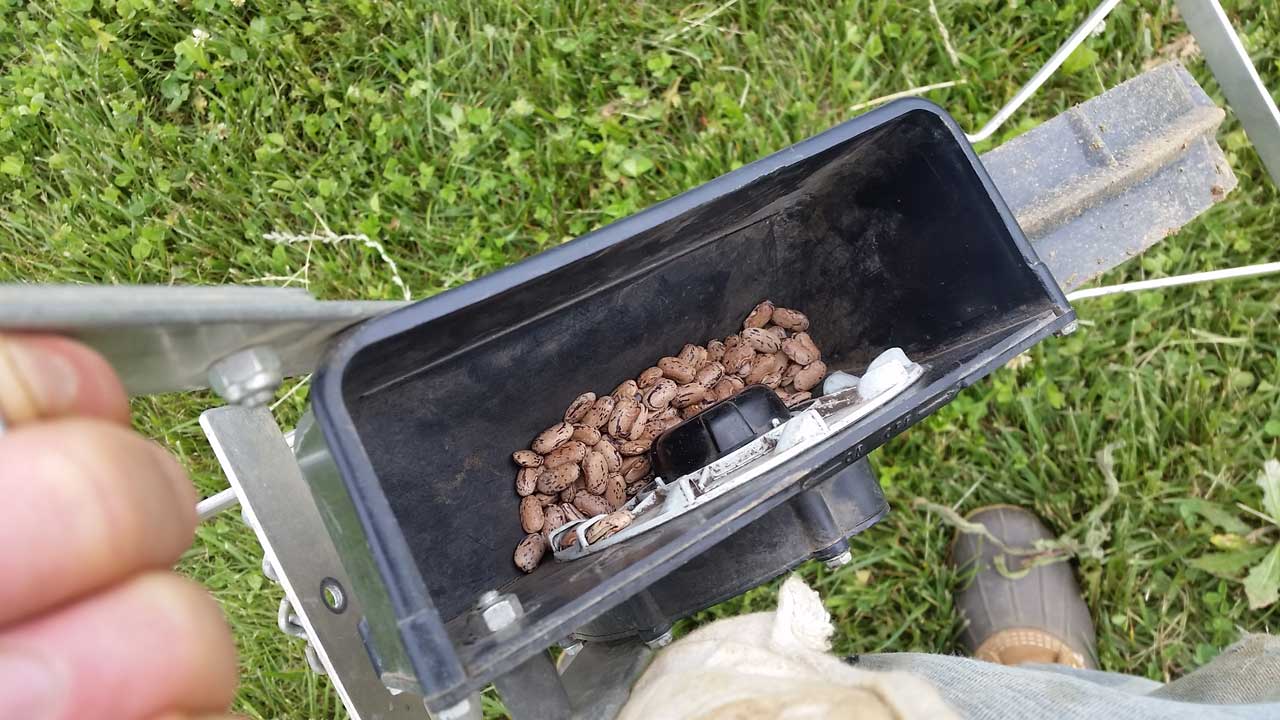
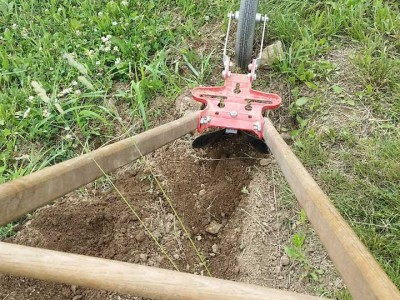
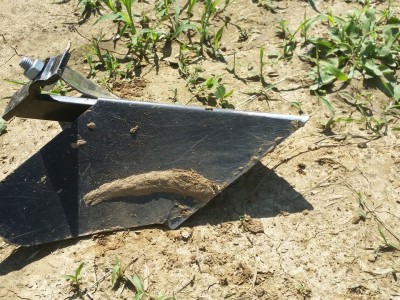
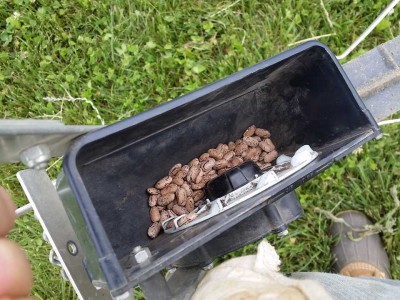
Late summer beans need to be planted around early to mid June, as we did ours just last week. For this process, you need a single row direct seeder (we used an old EarthWay vegetable Seeder,) something to furrow with (we used a wheel how with a furrow attachment,) the beans you want to plant, and potentially some organic seed inoculant.

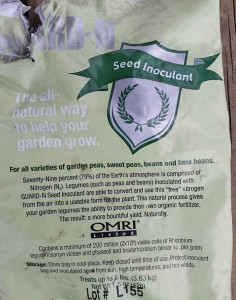
The package of our GUARD-N Seed Inoculant

The package of our GUARD-N Seed Inoculant

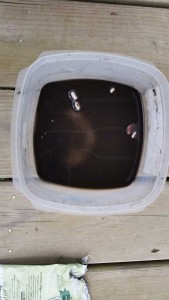
The inoculant as we used it to soak our beans.

The inoculant as we used it to soak our beans

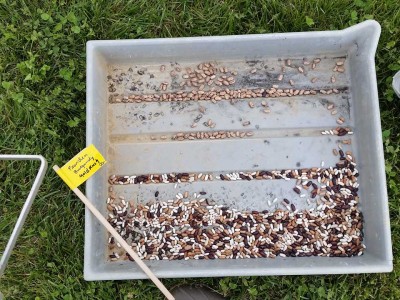
Beans, like all legumes such as peas and certain types of clover, grow nitrogen nodules on their roots to leave in the ground, which boosts the nitrogen in soil tremendously. This is why farmers really like legumes as cover crops and designing crop rotations that have nitrogen intensive crops like corn following legumes. Seed Inoculant facilitates beans’ conversion of in-air nitrogen into these nitrogen nodules, increasing the nitrogen fixing effect even further! This makes it useful to use innoculant. To use seen inoculant, you actually create a bath of the stuff and soak your beans in them a bit before you plant.

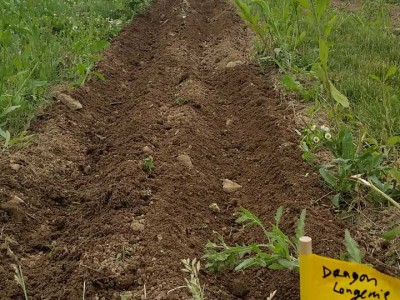
The next thing you must do is prepare the bed. We used a freshly-tilled, 100′ long, 3′ wide bed, and we knew we wanted 2 rows of beans in the bed. So, we took our trusty wheel hoe with a furrowing attachment and ran it down the length of the row twice, 1′ from each end of the bed (and the other furrow.)

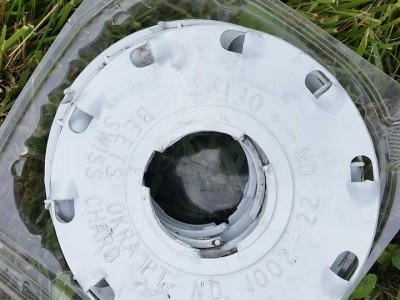
Once you have inoculated your beans and furrowed your bed, you need to get your seeder ready. Make sure you have the correct sized disc for beans in your seeder before you start loading the beans into the seeder!

From here, you need to only take the seeder and run it down the furrow, keeping as straight as possible. Most modern seeders are designed to cover the seeds right after they come out of the dispenser and then compact the soil over them, but if your seeder does not you will need to go down the furrow after you’ve planted and cover your seeds by pulling dirt from the furrow over top of them.

Hope this helps, and happy farming!

Joe Ingrao, Summer 2015 EXCEL Scholar
The Smell of Spring

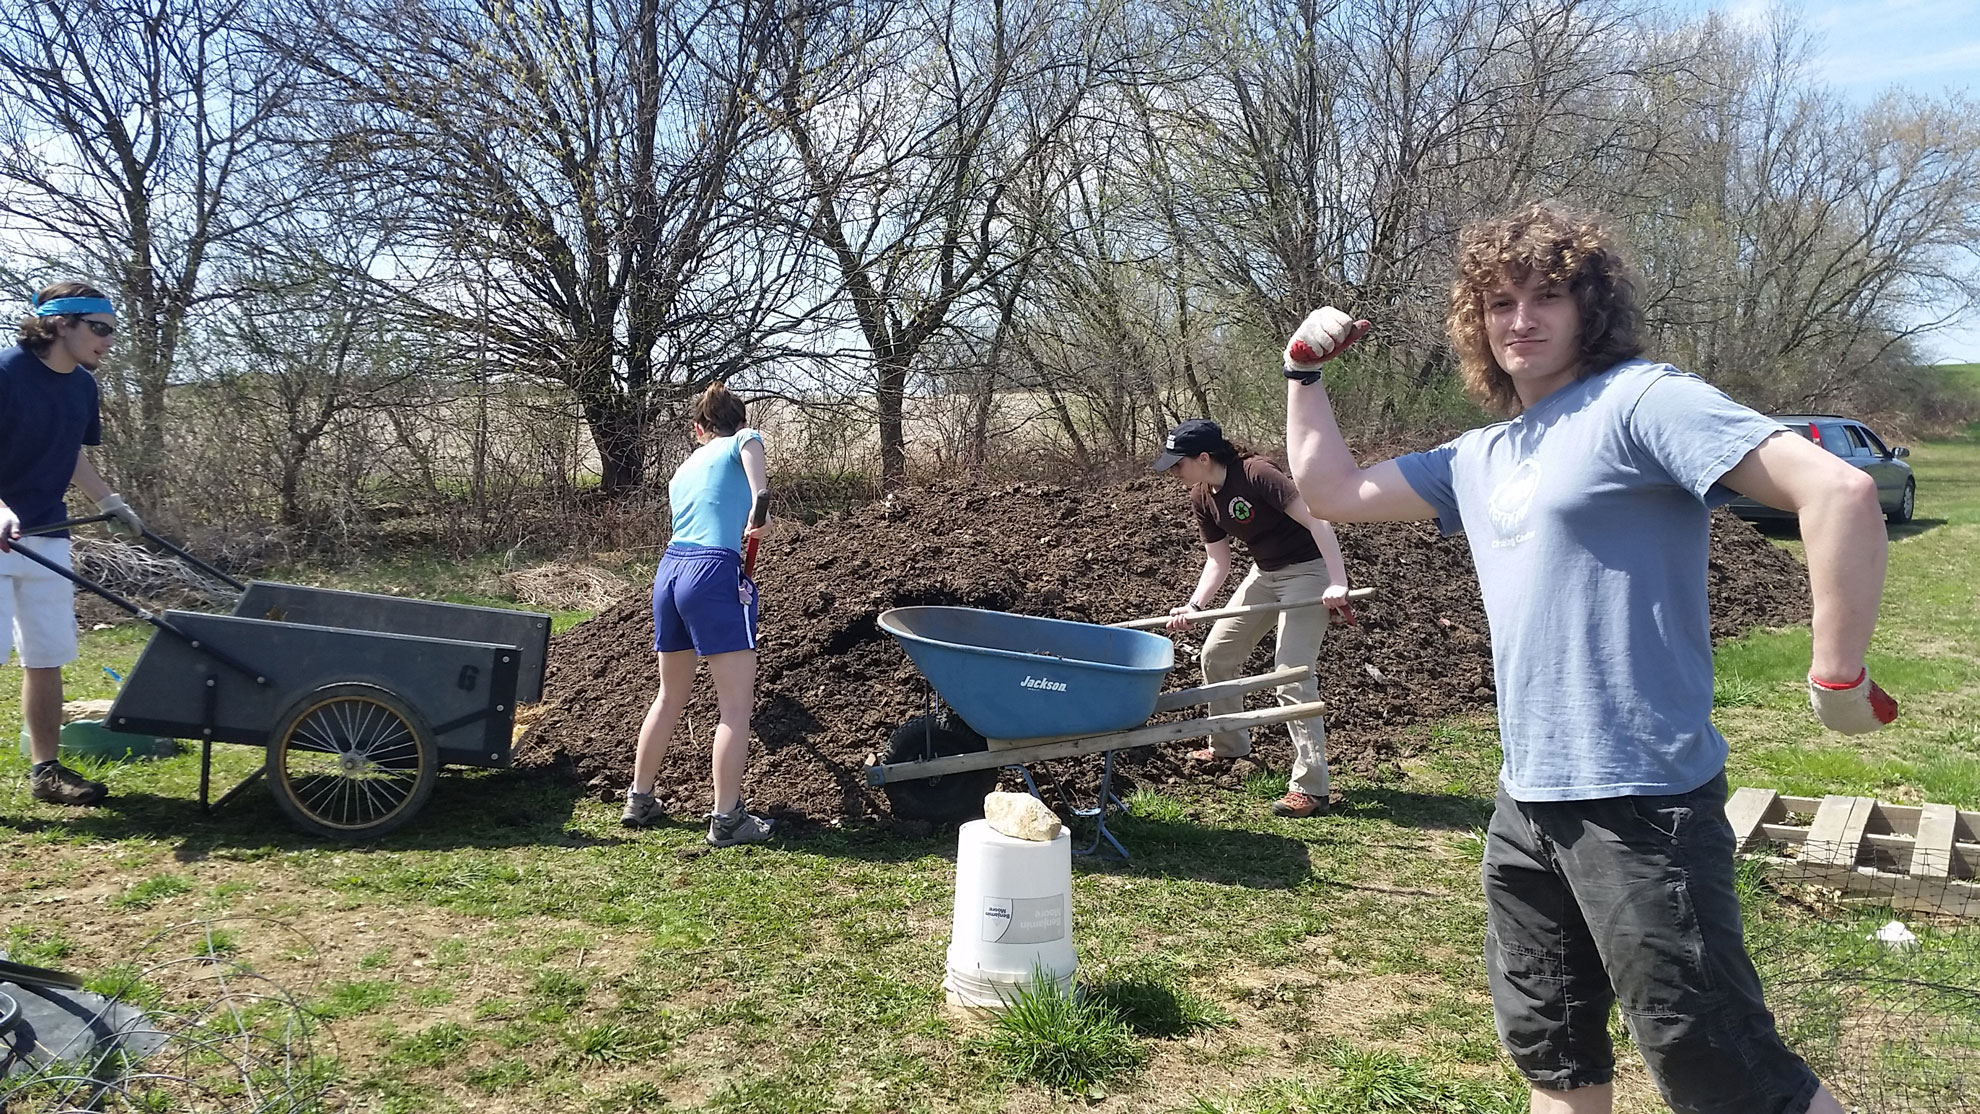
When I imagine Spring, I think of sunshowers and wildflowers. And when I think of farm work in Spring, I think of early plantings like onions, peas, and potatoes. I don’t usually think of the smell of compost (I no longer have anything against the smell of good compost though—now that I’ve seen the amazing results of such compost the smell just reminds me of success.) But one of the most grueling—and important—tasks of Spring farming is spreading compost. So we invited our friends to help!
Shoveling compost takes a lot of strength!  Pictured: (from left to right) Fletcher Horowitz, Miranda Wilcha, Monica Wentz, and Benji Helbein.

Shoveling compost takes a lot of strength!
Pictured: (from left to right) Fletcher Horowitz, Miranda Wilcha, Monica Wentz, and Benji Helbein.

Work is much more fun when you make it a party, and Spring farm days definitely make good parties! Even getting a team of 5 or so people out to shovel compost evokes feelings of community and family which we don’t get everyday in our modern, disconnected lives. So it’s very nice to get a bunch of people together to do something like this (especially if it means that just one person needs to do it for 5 times as long later on!) which is totally doable because it doesn’t take much background knowledge to shovel and spread nutrient rich dirt.

Spreading compost is not the most glamorous farm job, but it is necessary and still fun in groups.

Spreading compost is not the most glamorous farm job, but it is necessary and still fun in groups.


After your primary cultivation (your first tilling of the soil in the Spring) you take your compost (we get ours straight back from the dining halls we sell to) and spread it over your beds until it’s about an inch thick. For this, we dump piles of compost on the field with a wheelbarrow or cart and then use a rake (tilling rakes work especially well) to spread it evenly. After spreading, we till the beds again to mix the wonderful nutrients in with our normal topsoil.

But truly, it feels wonderful to be back outside, no matter what you’re doing on the farm, and all the more so when you can share it with friends. Here’s to hoping for a good season!

Joe Ingrao, Spring 2015 EXCEL Scholar