Set Up Procedure
- Start the ad-hoc network (or a standard wireless network which does not use packetfence).
- Start the light controller module. The LCD screen will show status signals. Wait until the LCD screen reaches the normal state (standard buttons and lighting status screen as shown in the figure below).
- Connect the motors to the shades and power up the motor control module by connecting it to a 5 volt DC power supply.
- Wait till ESP on module connects to the server ESP at the light controller module (can be viewed by connecting the serial ports of the light control module ESP to a serial terminal).
- Calibrate motors. Press both buttons for the one motor. Wait till shade stops moving. Press the other two buttons for the other motor.
Operating Procedure
- Manual control from shade control module
- Pressing and holding down an individual buttons on the motor control module (as shown below) moves the shade in one direction of the dimension (rotation or horizontal).
- Pressing an individual button twice moves that dimensional motor to the end.
- Manual adjustment from the light control module
- Pressing the increase button attempts to move the shades in the opening protocol.
- Pressing the decrease button attempts to move the shade in the closing protocol.
- Pressing the stop button stops the motion of the shades.
- Pressing the light button toggles the electrical lighting (symbolized by an LED).
- Automatic lighting control
- Pressing the Increase Brightness button increases the desired brightness level.
- Pressing the Decrease Brightness button decreases the desired brightness level.
- If the current brightness level leaves a ±5% threshold from the set brightness level, a command is sent to the motors to adjust the shades.
- Electrical Light: Turn off before attempting to decrease brightness. Turn on after increasing brightness and shades are maximally open.
- Pressing the stop button stops the motion of the shades.
- Web Interface (linked here Web_Interface)
- Pressing the increase button attempts to move the shades in the opening protocol.
- Pressing the decrease button attempts to move the shade in the closing protocol.
- Pressing the stop button stops the motion of the shades.
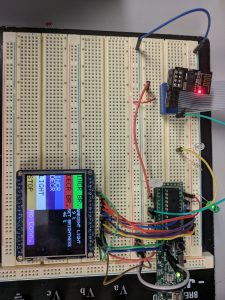
Light Control module (Normal operating mode shown on LCD screen)
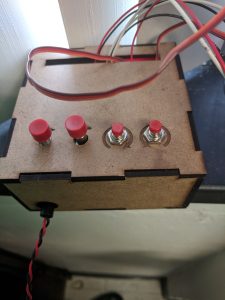
Motor control module (Two buttons per motor/dimension)

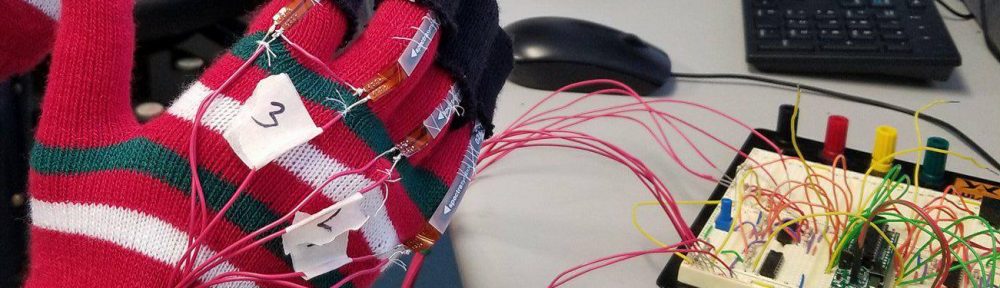
Motor setup (with shade strings)
Troubleshooting
- Connect the serial ports of the ESP to a serial terminal using a USB-UART cable. This allows you to spy on the communication between the ESP module and the PIC.
- Press the No. Conn button on the light control module to remove all connections made with the ESP module on the light controller.