Amtrak, B-Movies, Web Development, and other nonsense

Category: Web Development (Page 3 of 4)

How I file things

At the end of my blog post about Hammerspoon and case conversion I had this aside: ” …it works well for storing electronic articles and books.” I’m going to expand a little on that and how it fits into my scheme for organizing information. Hat-tip to nateofnine for prodding me into sharing this.

The Library of Zotero

Spreadsheet of citations

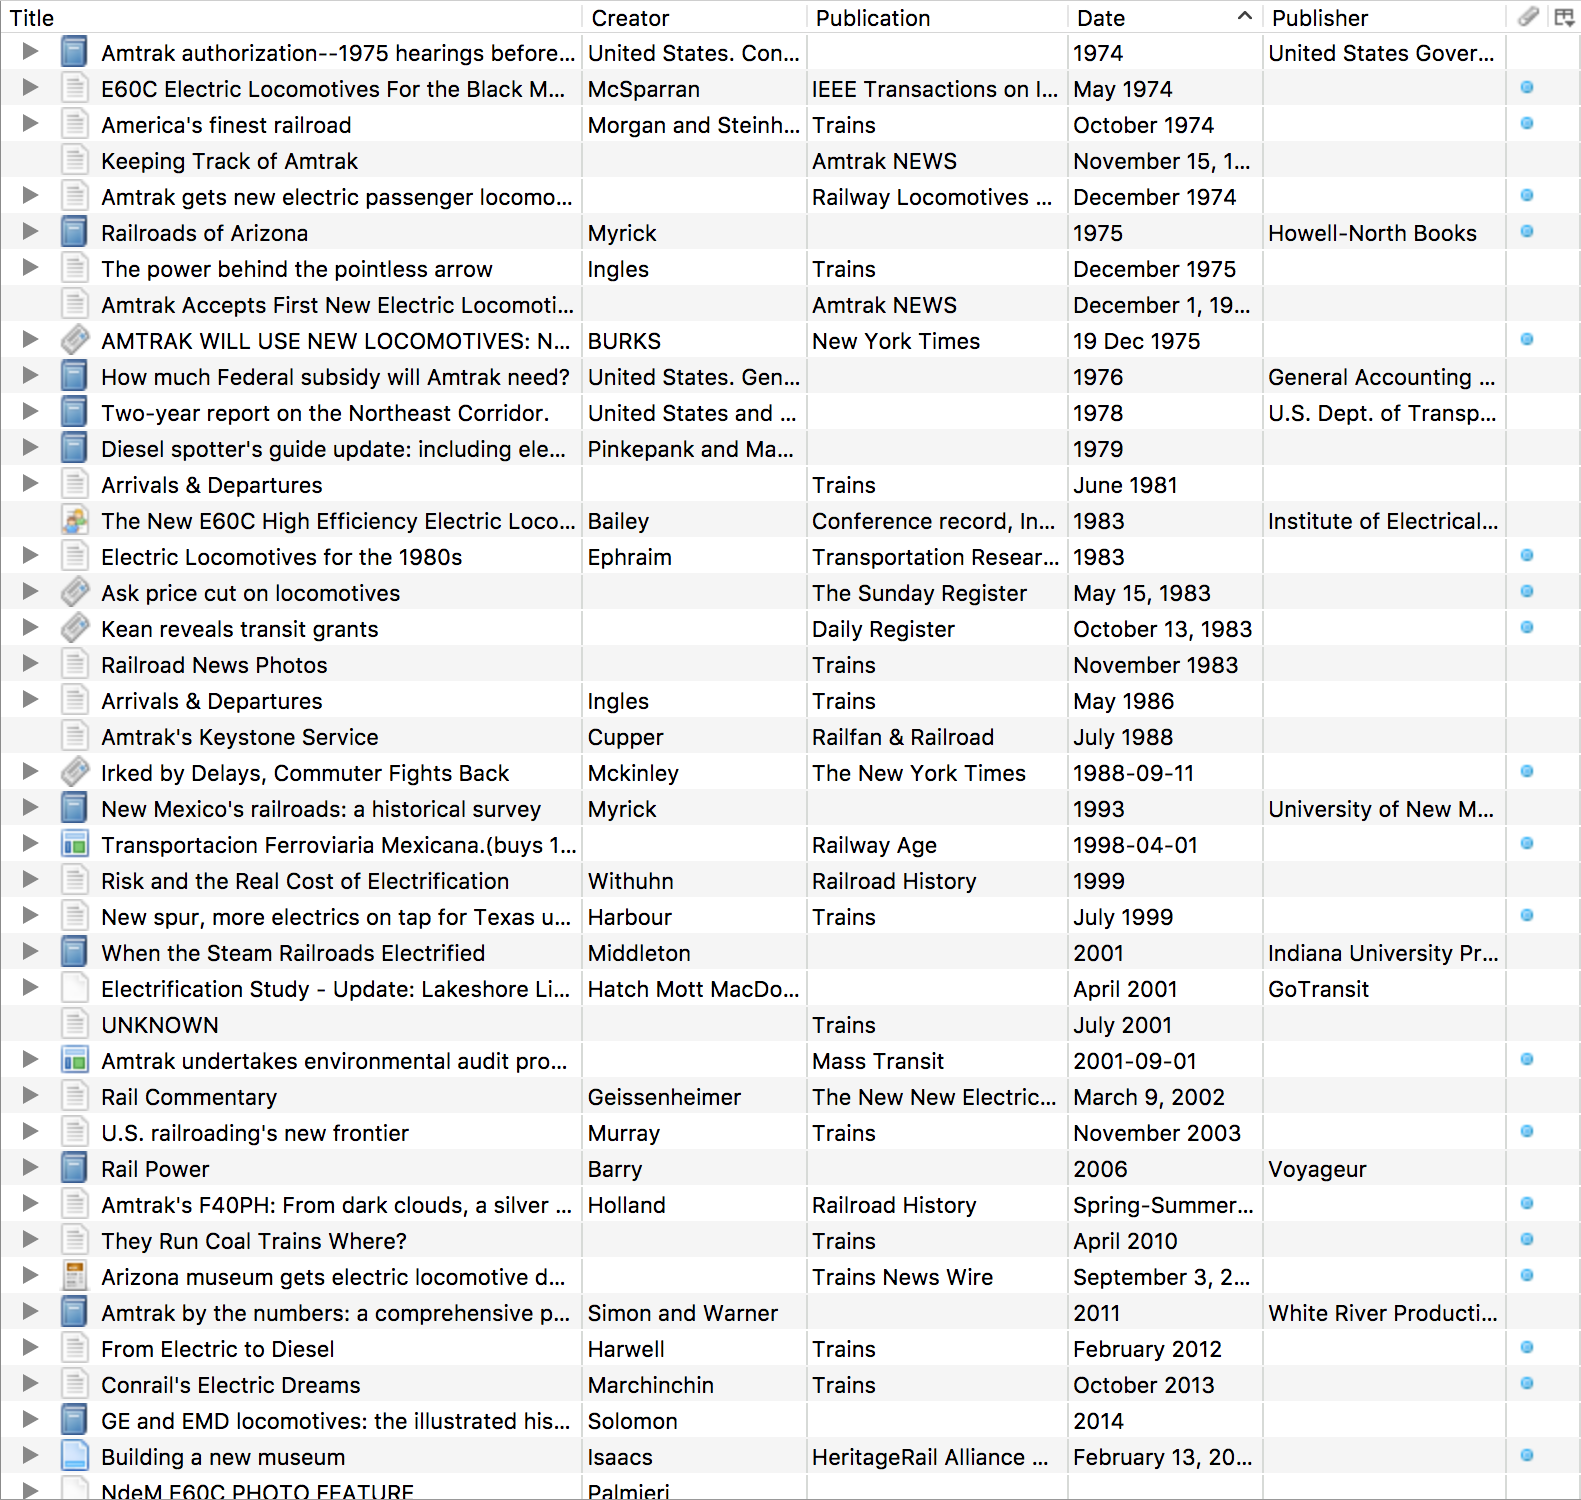
A typical Zotero collection. This one contains everything tagged for the GE E60 electric locomotive. Exciting, right?

I use Zotero to keep track of information, mostly related to railroading history. I wrote a post last year about developing a custom translator for importing articles. As of writing I have 1193 1200 items indexed in Zotero: books, chapters, journal and newspaper articles, blog posts, doctoral theses, maps, etc.

Zotero lets you attach things to an entry such as notes or tags. You can also link an external resource. This might be a website, or a link to the a local copy of the document if one exists. Zotero lets you sync content to its cloud, but the free tier is limited to 300 MB. If you’re storing article PDFs you’ll exceed that pretty quickly. Leaving aside HTML snapshots, I have 249 articles consuming ~2.5 GB of space.

Let the data flow

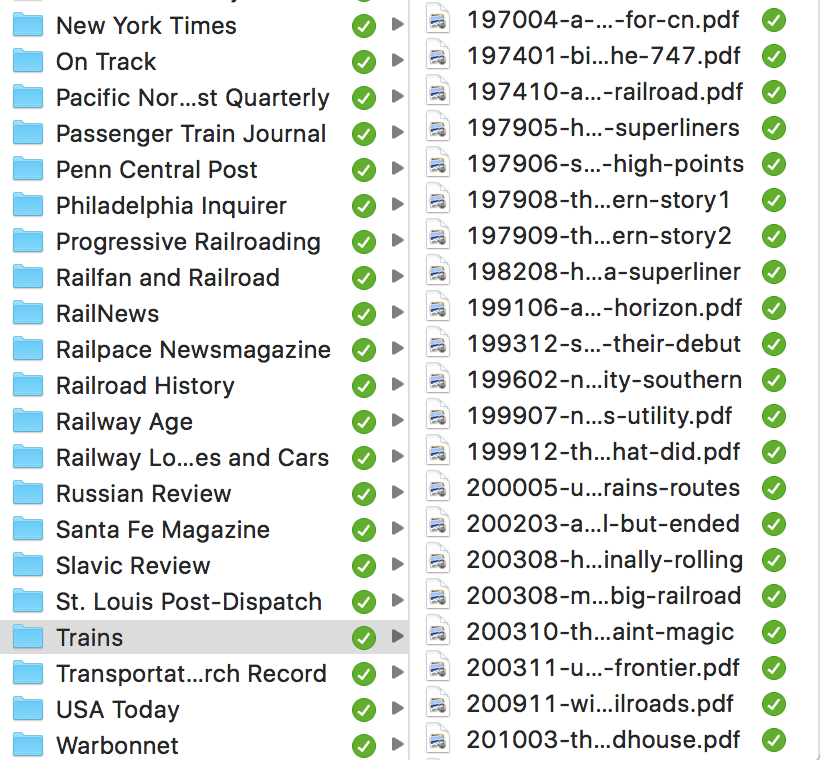
Electronic documents come from all over the place—interlibrary loan, online databases, websites, scans I’ve done myself of physical media that I possess but need to store. The only common factor that is that they become a PDF and I need to organize them.

I start by having a folder structure with a top-level folder named Articles. Beneath that I organize by publication, with definite articles removed to permit natural sorting (thus The New York Times becomes New York Times). Within each publication I adopt a naming convention of DATE-NAME. Date is of the format YYYY, YYYYMM, or YYYYMMDD, depending on the granularity of the publication. A monthly journal, for example, will go no further than YYYYMM. The purpose of this is to ensure chronological sorting when looking at the articles outside of Zotero.

For the NAME, I fall back on my Hammerspoon case conversion module. I’ve already created an entry for the item in Zotero, with its full title. I throw that title into the case conversion, get the slug, and append it to the date. This gives me a filename that sorts by date, is human-readable if need be, and is easy to manipulate from the command line. For example, J. David Ingles’ article in Trains magazine from the May 1979 issue entitled “How super are the Superliners?” becomes 197905-how-super-are-the-superliners.

Putting it all together

The file created, I drop it into the appropriate publication folder, then use the “Add Attachment > Attach Link to File” option in Zotero to associate it with the index. Now, when I double-click on the item in Zotero, it’ll open the file for me to read. The Articles directory tree lives on my Nextcloud which means that (a) there’s redundancy in case something happens to my laptop and (b) I can read the articles on my phone, without needing to have Zotero installed.


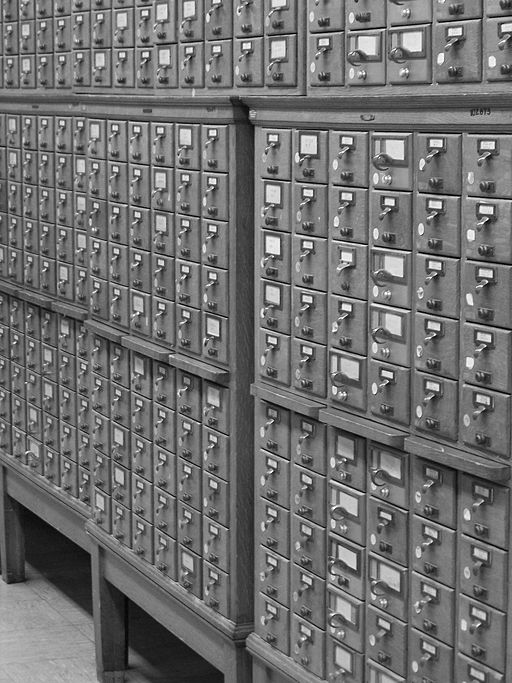
Featured image by Sue Peacock (card catalogs) [CC BY-SA 2.0], via Wikimedia Commons

Writing LDAP unit tests for a Moodle plugin

In 2016 Lafayette College began maintaining the LDAP Syncing Scripts (local_ldap) plugin after the tragic death of the previous maintainer, Patrick Pollet.

I didn’t know Patrick but he had a strong reputation in the Moodle community. I’m pleased to say that we made few substantive changes to his code. Most of the changes were simple updates, such as migrating the command-line/cron scripts to Moodle’s task infrastructure, and various nit-picky code standards issues which didn’t affect functionality.

PHPUnit

The biggest lift was implementing PHPUnit test coverage for the plugin. I started out with the following requirements:

  • Fully-scripted setup for OpenLDAP, so that the tests can run inside a continuous integration environment
  • Test coverage for group synchronization
  • Test coverage for attribute synchronization

I started this project by building an OpenLDAP environment inside Moodle Hat, the Vagrant development profile I maintain. Implementing a configuration in Puppet is good practice for wrestling with Travis.

Starting from scratch with OpenLDAP (every time!) presents certain challenges that you don’t encounter in a mature environment. A few I encountered:

  1. When you bootstrap OpenLDAP it has a completely empty schema. PHP’s ldap libraries can’t talk to it in that state. You have to populate it with some data, even if it’s completely arbitrary.
  2. Selection of backend databases matter. LDIF is the quick and easy path, but it doesn’t support pagination and Moodle will break in obscure ways. I chose bdb because it’s available in most repositories and it worked.
  3. When you’re setting a generic testing password in your slapd.conf you can just dump in rootpw SomeArbitraryPlaintextPassword and it’ll work. Don’t run in production! Or, really, anywhere that has state.

Once I’d worked through those issues Christian Weiske’s invaluable blog post provided everything I needed for implementing on Travis.

Travis

LDAP Syncing Scripts leverages Moodlerooms’ excellent moodle-plugin-ci plugin for travis-ci integration, with a few tweaks. The full travis-ci.yml file is visible on the GitHub repository; let me walk through a few things.

We need the slapd and ldap-utils packages installed. To use Moodle’s built-in LDAP PHPUnit testing we need to define the location of the test server in the config file:

define("TEST_AUTH_LDAP_HOST_URL", "ldap://localhost:3389");
define("TEST_AUTH_LDAP_BIND_DN", "cn=admin,dc=example,dc=com");
define("TEST_AUTH_LDAP_BIND_PW", "password");
define("TEST_AUTH_LDAP_DOMAIN", "dc=example,dc=com");

We need to create an INI file to force PHP (in travis) to load the ldap extension, and a slapd.conf file to define how our OpenLDAP enviroment will function. The schema settings need to match what you added to Moodle’s config.php. We start slapd and then, as the final step, import our default data. This data isn’t used, but it gets around the problem of an empty schema. Note that while this data is stored as an ldif file for readability purpose, the backend is bdb.

Tests

The actual tests I derived from the tests for Moodle’s auth_ldap plugin. The code is long but self-documenting. There are no particular gotchas, though I found it helpful to extend auth_ldap_plugin_testcase instead of starting fresh.

Hammering Cases

Last December I went down to Philadelphia for WordCamp US 2016. Met some great people, heard some great talks, overall had a good time. Holding the after party at the Academy of Natural Sciences was a genius move.

Sitting at Lisa Yoder’s talk on Version Control Your Life: Alternate Uses For Git inspired me to try taking notes in Markdown (versioned in git) instead of Evernote. I’m trying to move away from Evernote anyway and it made perfect sense. I’m always working on the command line; I always have Typora open as scratch-space.

I ran into an immediate (and silly) snag. All the WCUS sessions are titled “This Is The Name Of My Awesome Talk”. That’s a bad filename if you’re working on the command line. Ideally I want my notes on that talk to be called “this-is-the-name-of-my-awesome-talk.md”. Manually typing all that is boring, and I’m lazy. Better way? Better way.

Hammering markdown

Separately, I’d been playing around with Hammerspoon the last few days. Hammerpsoon is an automation engine for OS X. You can write Lua modules to perform various tasks, triggered by system events or manual invocation. It seemed cool and all, but I hadn’t found a concrete use case. Sitting in that talk, I had an idea—use Hammerspoon to convert arbitrary text (like a talk title) to an URL slug, which I could then use as a filename.

The actual module is pretty short; 38 lines including comments. Aside from some Wikipedia modules I don’t really have exposure to Lua, and Hammerspoon itself was terra incognita. Let’s step through this:

hs.hotkey.bind({"cmd", "alt", "ctrl"}, "T", function()

hs is the primary Hammerspoon object. I’m binding ⌃⌥⌘T; pressing that combination will activate the code within the module.

    local current = hs.application.frontmostApplication()

Brings the application forward so that we can send events to it.

    local chooser = hs.chooser.new(function(chosen)
        current:activate()
        hs.pasteboard.setContents(chosen.text)
    end)

Creates a chooser window and tells it to send the result of that window to the system clipboard. Now, here’s the actual callback:

    chooser:queryChangedCallback(function(string)
        local choices = {
            {
                ["text"] = string:lower(string),
                ["subText"] = "All lower case"
            },
            {
                ["text"] = string:upper(string),
                ["subText"] = "All upper case"
            },
            {
                ["text"] = string.gsub(" "..string, "%W%l", string.upper):sub(2),
                ["subText"] = "Capitalized case"
            },
            {
                ["text"] = string.gsub(string.gsub(string:lower(string),"[^ A-Za-z0-9]",""),"[ ]+","-"),
                ["subText"] = "Post slug"
            }
        }
        chooser:choices(choices)
    end)

This is where we actually create the chooser window and populate it with options. This is mostly string math. Hat tip to n1xx1 on stackoverflow for the capitalized case logic and Draco Blue for the post slug.

We’re almost done!

    chooser:searchSubText(false)

Tell the chooser to not search the sub text. Frankly I’m not sure what it does, but I saw it done in another module.

    chooser:show()

Finally, display the chooser window.

Putting it all together

With the module installed, I’m a keyboard combination and a copy-paste sequence away from a post-friendly slug for any bit of arbitrary text:

I finished up the module during the second round of talks. At the time I was half-worried that the project violated the XKCD rule, but I’ve found myself using it more and more over the last few months. Beyond note-taking, it works well for storing electronic articles and books. Besides, I had a good time doing it and learned something new.

Nextcloud on Pi

Following on with running Plex on a Raspberry Pi, I decided to play around with Nextcloud. This is very much a work in progress, with all my failures and blind alleys lovingly detailed. Note: some guides refer to both ownCloud and Nextcloud almost interchangeably. Nextcloud is a fork of ownCloud; technologically they’re very close. The Nextcloud desktop client is a themed fork of ownCloud’s and they’re compatible with the other’s servers.

Web application

At its core Nextcloud is a PHP application; setting those up isn’t complicated and there’s a good guide for doing so on a Raspberry Pi. I broke with it and opted for PHP 7 over for performance reasons. I used part of Andy Miller’s guide for that (ignoring the Nginx stuff) but I found I needed more PHP modules:

sudo apt-get install -t stretch php7.0 php7.0-gd php7.0-sqlite3 php7.0-curl php7.0-opcache php7.0-zip php7.0-xml php7.0-mbstring

Data storage

I went down a number of blind alleys with the backend. If you’re planning to have the bulk of your storage live external to the Pi you shoud still keep Nextcloud’s data directory local. The first thing I tried doing was simply putting it on an NFS share as I’d done with Plex. This was a bad idea and didn’t work. Nextcloud supports a concept of external storage; users can choose to add Samba shares, Google Drive folders, etc. That’s the proper way to attack the issue.

I tried Samba/CIFS first. Mounting a share from the Synology NAS worked fine but after a successful initial sync I encountered an error in which I was notified every couple minutes about remote changes and prompted to resolve them, although no such changes had taken place. I ensured that the clocks were synced between my laptop, the Pi, and the NAS, but didn’t solve it. I think the root cause is this issue in the ownCloud client; it’s solved in master but not in a compiled release. I encountered environment problems trying to compile the client and decided to try a different method.

Happily, I encountered no problems setting up WebDAV. As with NFS, you do have to enable it on the Synology NAS, but once you’ve done that you can just add it as external storage. I found that I needed to re-do the sync with the client after changing external storage methods, even though they had the same directory structure. I’m still getting some spurious notifications from the Nextcloud client but they’re infrequent, don’t require action, and don’t steal focus.

External access

I did all this as a proof-of-concept with HTTP access only and a local IP. To make this truly useful you need to be able to access your files from offsite. To make that practical and secure you need a domain name and an SSL certificate.

I registered a domain from hover; a friend recommended them and they seemed reasonably priced. I pointed an A-record at my current IP, which is somewhat static. I didn’t bother with any dynamic DNS solutions; I can accept the 24 hours it takes for the record to propagate when my IP eventually changes.

The Pi is behind two NATs: my cable modem and my wireless router. As with Plex I set 443 to forward from the outside world to the Pi. I think port 80 is blocked by my provider and I’m not offering anything on 80 anyway.

For the SSL certificate I went with Let’s Encrypt. I’ve used them with other small projects. The instructions for Certbot on Debian 8 (jessie) mostly worked; I found that I needed to import two repository keys. Once I did that I was able to run Certbot which handled all the SSL configuration on the host.

Cleaning up

With an HTTPS-fronted domain live I added that domain to the list of trusted domains on the server, then swapped out the client configuration on my laptop. Nextcloud appeared to recognize that it was dealing with the same server and didn’t need re-sync anything.

I’ve been running in this configuration for close to a week and it’s been smooth sailing.

Featured image by fir0002 | flagstaffotos.com.au [GFDL 1.2], via Wikimedia Commons

Raspberry Plex

I’ve been running Plex on a Synology NAS for the last year, with a Google Chromecast handling display. It’s worked well enough, but my DS 216 struggles at times to keep up with the movie (I’m not transcoding; that would never work). I decided to get into the Raspberry Pi game and build a Plex server on it, while keeping my media on the NAS. These are my notes on setup.

Image

I’m comfortable in Debian so I started with a stock Raspbian image on a 32 GB SD card. I used Etcher on OSX for this and didn’t encounter problems. I’d say it took 8-10 minutes.

Keyboard

Raspberry Pi’s come with the keyboard set to the UK, which works for most things but can trip you up. I changed it to Generic 105-key PC and selected a US keyboard layout.

DHCP

I created a reservation on my router for the Pi’s hardware address so that the IP would be consistent. The procedure for doing so will vary depending on your home networking environment. You’ll need to know the hardware address of the interface you’re using (wired or wireless).

I opted for the wired interface. As an additional step, I changed the configuration in /etc/network/interfaces from iface eth0 inet manual to iface eth0 inet dhcp. This is a little misleading; the interface still gets an IP address via DHCP when set to manual, but it happens later in the boot process. This causes problems with mouting an NFS share.

SSH

SSH access is disabled by default; I enabled it and setup key-based authentication as an extra security measure. You can disable password authentication by setting PasswordAuthentication to no in /etc/ssh/sshd_config and restarting ssh.

NFS

That was all preliminaries for the interesting part—making my existing media libraries available to the Pi. On my Synology NAS I enabled NFS as a service and then enabled NFS sharing for my media library.

On the Pi I installed and enabled the rpcbind service:

pi@raspberrypi:/mnt $ sudo update-rc.d rpcbind enable
pi@raspberrypi:/mnt $ sudo service rpcbind restart

I then created a mount point for the media:

sudo mkdir /mnt/media
chown pi:pi /mnt/media
Finally, I added an entry for this mount in /etc/fstab and mounted it:
{IP ADDRESS}:/volume1/Media /mnt/media nfs rw 0 0
sudo mount -a

Plex

Much of the foregoing is based on the excellent tutorial on installing Plex on a Pi from element14. At this point I’m ready to install the various packages:

sudo apt-get install apt-transport-https -y --force-yes
wget -O - https://dev2day.de/pms/dev2day-pms.gpg.key  | sudo apt-key add -
echo "deb https://dev2day.de/pms/ jessie main" | sudo tee /etc/apt/sources.list.d/pms.list
sudo apt-get update
sudo apt-get install -t jessie plexmediaserver -y

I rebooted the Pi and was good to go.

Issues

These aren’t specific to the Pi but just things I encountered.

  • I had created down-scaled “versions” of some of my media for playback purposes. The new Plex found these, but they got commingled with the actual media leading to Plex detecting the wrong audio type (e.g. AAC instead of DTS). The Chromecast refused to play said media. I resolved it by deleting the “versions”, re-matching the media in question, and re-creating the version.
  • I’d forgotten that my setup is a “Double NAT“; to allow remote access I had to pass traffic from my cable modem to my internal router and then on to the Pi.

Featured image by Sven.petersen (Own work) [CC BY-SA 4.0], via Wikimedia Commons.

Writing a Zotero translator

Sometimes I joke that I do web development to support my railfanning habit. It’s not entirely true, but it’s always pleasant when the two intersect.

I’m a Trains subscriber. Trains is a monthly publication which serves both those who actually work in the railroad industry and enthusiasts (railfans) like me. Beyond the monthly print publication (which I get electronically, but never mind), Trains publishes a daily news feed called News Wire. There’s lots of good information here on the various comings and goings in the industry, though US-centric.

I use Zotero to index information for research projects–mostly railroading, but other topics as well. There’s an extension for Chrome, Zotero Connector, which lets you import web content directly into Zotero, saving a lot of manual entry. Many publications like The Atlantic and The Washington Post are natively supported. When one isn’t, Zotero makes a best guess based on page structure and metadata. How well that works depends on how well-formed the page here.

This is where we have a problem. The News Wire postings don’t have proper metadata at all–you need to scrape the page to find all the relevant parts. Zotero doesn’t know how to do that. The result is that one article imported with the following values:

Title Amtrak AEM-7 arrives in Strasburg | Trains Magazine
Author 12, Wayne Laepple | June
Author 2015
Website Title TrainsMag.com
URL http://trn.trains.com/news/news-wire/2015/06/12strasburg

Not so much. This is all on page. The title comes from the page title, probably because there are multiple h1 headers defined. The date and the author are commingled in a “byline” div.

Fortunately you can roll your own definition; Zotero calls these “Translators“. There’s a primer which I found useful, though it omitted some steps. The easiest way to proceed is to use Zotero Scaffold, which is an IDE for Mozilla Firefox. I use standalone Zotero with Chrome so I didn’t have Zotero for Firefox installed. If you don’t Scaffold will install but will not work. No error messages; it just sits there. This was incredibly frustrating until I realized my error.

Zotero Scaffold will write out a completed definition to the translators directory inside your Zotero data directory. On OSX mine was in /Users/foo/Library/Application Support/Zotero/Profiles/random string/zotero/translators. I’ve posted one to github as a gist: https://gist.github.com/mackensen/981b1d5393e07e8435798eaee843e3fc. A few comments on this:

  • Scaffold takes care of all the front matter, including the GUID.
  • detectWeb and doWeb can be more complex if there are different types of data (such as a search results page). I deliberately provided a narrow page target so we’re only handling single posts.
  • All the terror is in scrape, where I used xpath queries to extract the parts of the page I needed and then format them appropriately. Don’t overlook the utility function cleanAuthor(), which takes an author string and breaks out component parts. In my first iteration I was reading the author and everything seemed fine but it didn’t import into Zotero.
  • Translators are loaded into memory by the browser. If you make a change, you’ll need to reload the browser (boo) or disable and reenable the extension (yay).

New result, same article:

Title Amtrak AEM-7 arrives in Strasburg
Author Laepple, Wayne
Blog Title Trains News Wire
Date June 12, 2015
URL http://trn.trains.com/news/news-wire/2015/06/12strasburg

Yeah, that’s much better.

Quick note on agent forwarding with Docker

I’ve been building a CI/deployment stack with GitLab CI, Docker, and Capistrano. I’m hoping to give a talk on this in the near future, but I wanted to add a brief note on a problem I solved using SSH agent forwarding in Docker in case anyone else runs into it.

In brief, I have code flowing like this:

  1. Push from local development environment to GitLab
  2. GitLab CI spins up a Docker container running Capistrano
  3. Capistrano deploys code to my staging environment via SSH

To do this elegantly requires a deploy user on the staging environment whose SSH key has read access to the repository on GitLab. I don’t want to deploy the private key to the remote staging server. The deploy tasks fire from the Docker container so we bake the private key into it:

# setup deploy key
RUN mkdir /root/.ssh
ADD repo-key /root/.ssh/id_rsa
RUN chmod 600 /root/.ssh/id_rsa
ADD config /root/.ssh/config

That part is relatively straightforward. Copy the private key into wherever you’re building the docker image (do not version it) and you’re good to go. Forwarding the key is trickier. First, you’ll have to tell Capistrano to use key forwarding in each deploy step. In 3.4.0 that looks like this:

 set :ssh_options, {
   forward_agent: true
 }

Next, you’ll have to bootstrap agent forwarding in your CI task. In a CI environment the docker container starts fresh every time and has even less state than usual. You need to start the agent and add your identity every time the task runs. See StackOverflow for a long discussion of agents and identifies. TLDR; add this step:

before_script:
 - eval `ssh-agent -s` && ssh-add

I experimented with adding that command to my Dockerfile but it didn’t work. This was the most common error: “Could not open a connection to your authentication agent.” The command has to be executed in the running container, which means in this case the CI task configuration, or the key won’t be forwarded and clones on the staging environment will fail with publickey denied.

The Changelog Is A Lie

Today at WordCamp Lancaster Ryan Duff gave a talk on “Choosing WordPress Themes And Plugins: A Guide To Making Good Decisions.” It jogged my mind about an incident on the WordPress.org plugins database I observed last year. This incident, though minor, illustrates the significant limitations with that place.

Two years ago–to the day–I called the WordPress.org plugins database a “swamp” and I stand by that. Ryan noted that there’s no canonical right way to select plugins and themes. You have to mitigate risk as much as possible. That means you have to look at a plugin in the round. WordPress.org gives you some tools for that: ratings, reviews, installation base, support forums. You can evaluate the social credit of the developer. You can review the code yourself, if you’re so inclined and have the technical background.

Here at Lafayette we use a plugin called Category Posts Widget. It’s pretty simple: it creates a widget which will display recent posts from a given category. Its original author released version 3.3 in August 2011 and then never updated it again. We’d been running it since 2010 or earlier. If we’d stumbled on it 2013 we’d have seen it was outdated and passed, but if a plugin keeps working you never really notice it’s been abandoned unless you have a regular review process (which we don’t).

In September 2014 a new author took ownership of the plugin and released an update, 4.0, which was of course automatically available for site owners. As we manage our multisites with git we have a code import process using svn2git, so we generally know how significant the changes are. Every plugin page on WordPress.org has a changelog, and the changes for this update sounded pretty routine:

  • Added CSS file for post styling
  • Now compaitable [sic] with latest versions of WordPress

Okay that sounds pretty helpful and…hey, check out the diff on those changes:

 cat-posts.php | 504 ++++++++++++++++++++++++++++++++--------------------------
 1 file changed, 279 insertions(+), 225 deletions(-)

Wait, what? That plugin was only 262 lines long! What the hell?

At the risk of a tired metaphor this was a wolf in sheep’s clothing. The new author had inserted a completely new plugin with no upgrade path under the guise of an update. While it provided the same functionality, you would have to manually update your widgets. If, like us, you maintain multiple multisite installations with hundreds of sites, this simply isn’t an option. This support forum discussion gives a taste of the anguish for downstream users.

We dodged a bullet because of our internal code review process, but there are few external indications on WordPress.org about what happened:

  • As of today, the plugin has 80,000+ active installs. That no doubt includes those clients who, like us, stayed on version 3.3. In November, when WordPress still counted downloads and not installations, it had 300,000+ downloads.
  • It stands at 3.9 of 5 stars, with 8 5-star reviews and 3 1-star reviews. Tellingly, most of these reviews are from after the 4.0 update, and apparently from new users who weren’t burned by the update. Only one of the 1-star reviews flags the upgrade issue.
  • The author has 3 plugins, though if you dig in you notice he isn’t very active in the WordPress community and his other two plugins aren’t widely used. His plugins page shows 317,000 downloads, which sounds great until you realize almost all of those predate his involvement.

Nothing in the WordPress.org environment flags that the new author usurped the plugin, assumed the social credit generated by the previous author, and then pushed through a breaking update which raised hell on downstream production sites. Discussion after the fact showed that he either didn’t care or didn’t understand how serious this was. The offer to submit pull requests to GitHub was better than nothing…except that months later there’s been no activity and no pull requests have been accepted.

I’m not sure how you fix this. On the face of it, a new a developer assuming responsibility for an abandoned but popular plugin (or theme) is a Good Thing so outlawing it isn’t a solution. Maybe if WordPress.org tracked activation history and author history, so you could drill down and get stats? Alternatively, some way to flag when a plugin has a breaking change. But for now,

Gulp, it’s Code-Checker!

Code-Checker is a tool distributed by Moodle HQ which lets you validate code against core coding standards. You install it as a local plugin in a development environment and run it against specified files. It then spits out all kinds of nit-picky errors:

theme/stellar/layout/default.php

  • #76: ····<?php·//·echo·$OUTPUT->page_heading();·?>
    
  • This comment is 67% valid code; is this commented out code?
  • Inline comments must start with a capital letter, digit or 3-dots sequence
  • Inline comments must end in full-stops, exclamation marks, or question marks

Code-Checker leverages the PHP_CodeSniffer tool; in essence it’s a set of CodeSniffer definitions wrapped in a Moodle plugin. This adds a fair amount of overhead for testing coding standards–you shouldn’t need a functional Moodle environment, nor for that matter a web server.

My preferred integration tool is gulp.js, a task-runner built on node. It’s similar to grunt but without all the front-loaded configuration. There’s a plugin for gulp called gulp-phpcs which integrates PHP_CodeSniffer with gulp and lets you check the files in your project. Happily it was pretty simple to do this with Moodle.

First, you need to have PHP_CodeSniffer available in your development environment. This is how I did it on my Macbook:

cd /usr/local
mkdir scripts
cd scripts
git clone https://github.com/squizlabs/PHP_CodeSniffer.git phpcs

I then added that directory to my PATH:

PATH=/usr/local/scripts/phpcs/scripts:$PATH

Finally, I cloned in the Moodle plugin and added its standards definition to the installed paths for PHP_CodeSniffer:

git clone https://github.com/moodlehq/moodle-local_codechecker.git moodlecs
cd phpcs
./scripts/phpcs --config-set installed_paths ../moodlecs

At this point we’re ready to integrate it into gulp. We need to install the gulp-phpcs module and add it to the project:

npm install gulp-phpcs --save-dev

Now we provide a basic configuration in our gulpfile.js. This example will check all the php files in Lafayette’s Stellar theme:

// List of modules used.
var gulp    = require('gulp'),
    phpcs   = require('gulp-phpcs');    // Moodle standards.

// Moodle coding standards.
gulp.task('standards', function() {
  return gulp.src(['*.php', './layout/**/*.php', './lang/**/*.php'])
    .pipe(phpcs({
      standard: 'moodle'
    })) 
    .pipe(phpcs.reporter('log'));
});

Invoked from the command line, we get the same results as from the web interface, but faster and without the overhead:

[10:24:21] PHP Code Sniffer found a problem in ../theme_stellar/layout/default.php
Message:
 Error: Command failed: 
 
 FILE: STDIN
 --------------------------------------------------------------------------------
 FOUND 0 ERROR(S) AND 3 WARNING(S) AFFECTING 1 LINE(S)
 --------------------------------------------------------------------------------
 76 | WARNING | Inline comments must start with a capital letter, digit or
 | | 3-dots sequence
 76 | WARNING | Inline comments must end in full-stops, exclamation marks, or
 | | question marks
 76 | WARNING | This comment is 67% valid code; is this commented out code?
 --------------------------------------------------------------------------------

This also lets you create watcher tasks to catch errors introduced while developing.

Wait, let me finish!

This summer we have our student worker building out a set of Behat tests for our WordPress environment. We’ve started with smoke tests. For example, on www.lafayette.edu we’re looking at the following:

  • Are there news items? If so, do the links to those items work?
  • Are there calendar events? If so, do the links to the events works?
  • Does the “Offices & Resources” drop-down function? Do the links in that drop-down work?

That’s a short list of tests but it covers a lot of ground:

  • The RSS feed validity between the main site and the news site
  • The RSS feed validity between the main site and the calendar
  • Whether Javascript still works on the main site
  • The proper functioning of every link in the drop-down

If any of these tests fails there’s a non-trivial problem with the main page. In the first iteration, we ran into a problem with testing the links in the drop-down. This was the original test:

                When I click on "#navResources-toggle" 
                And I click the link <link>

This was within a Scenario Outline testing each link. It failed, each time, with some variation of the following:

 Exception thrown by (//html/.//a[./@href][(((./@id = 'foo' or contains(normalize-space(string(.)), 'foo')) or contains(./@title, 'foo') or contains(./@rel, 'foo')) or .//img[contains(./@alt, 'foo')])] | .//*[./@role = 'link'][((./@id = 'foo' or contains(./@value, 'foo')) or contains(./@title, 'foo') or contains(normalize-space(string(.)), 'foo'))])[1]
 unknown error: Element is not clickable at point (573, -163)

Googling suggested fiddling with the click location, which didn’t feel right. Triggering a drop-down menu and clicking a link is a simple enough use case. Simple problems should have simple answers.

Turns out this is a race condition and it reveals something about behavioral testing. The drop-down menu on the main page doesn’t open right away. We have some easing, timeouts, and animation which all mean that it takes a second or so to finish loading. During that time the links are actually moving from their starting point at the top of the page. Go try to clicking on the menu and you’ll see what I’m describing. This means that a normal user will wait for 1-2 seconds before clicking a link. We didn’t write the test that way, which meant that the location of link changed from the time we told Behat to click it and when Behat tried to click it.

The solution? Write the test like Behat is an actual user and build in that delay:

                When I click on "#navResources-toggle"
                And wait 2 seconds
                And I click the link <link>

The order of operations matters. Now, Behat doesn’t click the link until two seconds have passed, at which point the drop-down is done expanding and the links are in their final location.

« Older posts Newer posts »