Amtrak, B-Movies, Web Development, and other nonsense

Tag: Raspberry Pi

Using TLS-ALPN-01 on a Raspberry PI

I’ll always read ALPN as Alpine

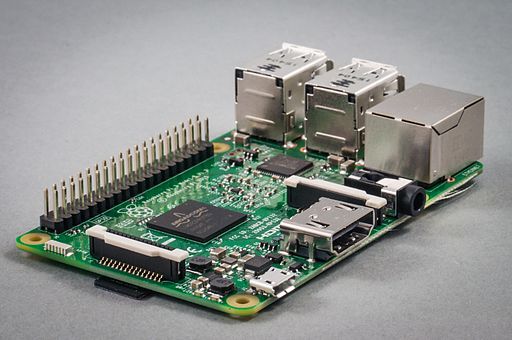
I run Nextcloud on my Raspberry PI and I have a certificate from Let’s Encrypt on it. I set this up a couple years ago with certbot and it’s been fine. I don’t expose port 80 in my environment so I’ve relied on the TLS-SNI-01 challenge using the certbot client which ships on Raspbian Jessie.

TLS-SNI-01 is now end-of-life because of security vulnerabilities so I needed to find an alternative. There are a couple different challenge methods available. Let’s Encrypt’s cerbot supports two:

  • HTTP-01: a random file is placed in the webroot of your server
  • DNS-01: a random TXT record is added to your DNS

Neither of these was a great option for me. Routing port 80 traffic really wasn’t something I wanted to do. The DNS option is feasible, but my current registrar doesn’t offer a good API I’d either have to change registrars or introduce a manual step to the renewal process.

Fortunately, there’s another option, but it involves a little work setting up: TLS-ALPN-01. Certbot doesn’t support it, but other clients do. After some trial-and-error, I settled on dehydration after reading a great Medium post by Sam Decrock.

Getting the Pi ready

One thing I’d noted during this whole process, though in the end it wasn’t relevant, is that the shipped version of certbot in Raspbian Jessie was really old, and newer versions required Python 3.5 or higher, but Jessie was stuck at 3.4+. Dehydration’s sample ALPN responder also depends on the ALPN support added to the ssl module in Python 3.5.

Stretch has been available for a year and half; I’d built my Pi maybe six months prior. The core instructions for a dist-upgrade went smoothly though it took a couple hours. The only oddity was that the wired network interface wasn’t available at boot. I added auto eth0 to /etc/network/interfaces to resolve the issue.

Setting up dehydration

I followed Decrock’s post closely for configuring dehydration. I dumped everything into /etc/dehydrated. The sample domains.txt has varous sample configurations; I replaced all of it with a single line containing my hostname. The sample responder worked out of the box once I had Python 3.5 available. The one gotcha is that you have stop Apache/Nginx/whichever before running the responder so that it can listen on port 443.

Migrating Apache

Apache was already configured to use the certbot-issued certificates. These were in /etc/letsencrypt/live/yourdomain/; dehydration’s were in /etc/dehydration/certs/yourdomain. Changing the paths in the default host configuration worked fine. I noted that dehydration didn’t appear to have anything comparable to the configuration block in /etc/letsencrypt/options-ssl-apache.conf (ciphers and such), so I copied that directly into the virtual host configuration. Apache started cleanly on the first try.

Automation and cleanup

Let’s Encrypt certificates have a shelf life of three months, and this is a recurring task I don’t want. The renewal process looks like this:

  1. Stop apache
  2. Start the responder on port 443
  3. Execute the renewal request
  4. Stop the responder
  5. Start apache

This isn’t as simple as the TLS-SNI-01 challenge and does involve a little bit of downtime. If we’re not in the renewal window this takes ~3-5 seconds; if it renews the certificate it’s more like 20 seconds. I wrapped up the whole process in a shell script, using nohup to background the responder task:

#!/bin/bash
/bin/systemctl stop apache2
/usr/bin/nohup /usr/bin/python3 /etc/dehydrated/alpn-responder.py > /dev/null 2>&1 &
alpnPID=$!
/etc/dehydrated/dehydrated -c -f /etc/dehydrated/config
kill $alpnPID
/bin/systemctl start apache2

The magic part here is getting the PID from the responder process so that we can safely kill it (and not anything else!) once the renewal task is complete. I scheduled this for the wee hours of the morning. Finally, I uninstalled the now-updated certbot package because I don’t need it anymore and it won’t work going forward anyway.

Nextcloud on Pi

Following on with running Plex on a Raspberry Pi, I decided to play around with Nextcloud. This is very much a work in progress, with all my failures and blind alleys lovingly detailed. Note: some guides refer to both ownCloud and Nextcloud almost interchangeably. Nextcloud is a fork of ownCloud; technologically they’re very close. The Nextcloud desktop client is a themed fork of ownCloud’s and they’re compatible with the other’s servers.

Web application

At its core Nextcloud is a PHP application; setting those up isn’t complicated and there’s a good guide for doing so on a Raspberry Pi. I broke with it and opted for PHP 7 over for performance reasons. I used part of Andy Miller’s guide for that (ignoring the Nginx stuff) but I found I needed more PHP modules:

sudo apt-get install -t stretch php7.0 php7.0-gd php7.0-sqlite3 php7.0-curl php7.0-opcache php7.0-zip php7.0-xml php7.0-mbstring

Data storage

I went down a number of blind alleys with the backend. If you’re planning to have the bulk of your storage live external to the Pi you shoud still keep Nextcloud’s data directory local. The first thing I tried doing was simply putting it on an NFS share as I’d done with Plex. This was a bad idea and didn’t work. Nextcloud supports a concept of external storage; users can choose to add Samba shares, Google Drive folders, etc. That’s the proper way to attack the issue.

I tried Samba/CIFS first. Mounting a share from the Synology NAS worked fine but after a successful initial sync I encountered an error in which I was notified every couple minutes about remote changes and prompted to resolve them, although no such changes had taken place. I ensured that the clocks were synced between my laptop, the Pi, and the NAS, but didn’t solve it. I think the root cause is this issue in the ownCloud client; it’s solved in master but not in a compiled release. I encountered environment problems trying to compile the client and decided to try a different method.

Happily, I encountered no problems setting up WebDAV. As with NFS, you do have to enable it on the Synology NAS, but once you’ve done that you can just add it as external storage. I found that I needed to re-do the sync with the client after changing external storage methods, even though they had the same directory structure. I’m still getting some spurious notifications from the Nextcloud client but they’re infrequent, don’t require action, and don’t steal focus.

External access

I did all this as a proof-of-concept with HTTP access only and a local IP. To make this truly useful you need to be able to access your files from offsite. To make that practical and secure you need a domain name and an SSL certificate.

I registered a domain from hover; a friend recommended them and they seemed reasonably priced. I pointed an A-record at my current IP, which is somewhat static. I didn’t bother with any dynamic DNS solutions; I can accept the 24 hours it takes for the record to propagate when my IP eventually changes.

The Pi is behind two NATs: my cable modem and my wireless router. As with Plex I set 443 to forward from the outside world to the Pi. I think port 80 is blocked by my provider and I’m not offering anything on 80 anyway.

For the SSL certificate I went with Let’s Encrypt. I’ve used them with other small projects. The instructions for Certbot on Debian 8 (jessie) mostly worked; I found that I needed to import two repository keys. Once I did that I was able to run Certbot which handled all the SSL configuration on the host.

Cleaning up

With an HTTPS-fronted domain live I added that domain to the list of trusted domains on the server, then swapped out the client configuration on my laptop. Nextcloud appeared to recognize that it was dealing with the same server and didn’t need re-sync anything.

I’ve been running in this configuration for close to a week and it’s been smooth sailing.

Featured image by fir0002 | flagstaffotos.com.au [GFDL 1.2], via Wikimedia Commons

Raspberry Plex

I’ve been running Plex on a Synology NAS for the last year, with a Google Chromecast handling display. It’s worked well enough, but my DS 216 struggles at times to keep up with the movie (I’m not transcoding; that would never work). I decided to get into the Raspberry Pi game and build a Plex server on it, while keeping my media on the NAS. These are my notes on setup.

Image

I’m comfortable in Debian so I started with a stock Raspbian image on a 32 GB SD card. I used Etcher on OSX for this and didn’t encounter problems. I’d say it took 8-10 minutes.

Keyboard

Raspberry Pi’s come with the keyboard set to the UK, which works for most things but can trip you up. I changed it to Generic 105-key PC and selected a US keyboard layout.

DHCP

I created a reservation on my router for the Pi’s hardware address so that the IP would be consistent. The procedure for doing so will vary depending on your home networking environment. You’ll need to know the hardware address of the interface you’re using (wired or wireless).

I opted for the wired interface. As an additional step, I changed the configuration in /etc/network/interfaces from iface eth0 inet manual to iface eth0 inet dhcp. This is a little misleading; the interface still gets an IP address via DHCP when set to manual, but it happens later in the boot process. This causes problems with mouting an NFS share.

SSH

SSH access is disabled by default; I enabled it and setup key-based authentication as an extra security measure. You can disable password authentication by setting PasswordAuthentication to no in /etc/ssh/sshd_config and restarting ssh.

NFS

That was all preliminaries for the interesting part—making my existing media libraries available to the Pi. On my Synology NAS I enabled NFS as a service and then enabled NFS sharing for my media library.

On the Pi I installed and enabled the rpcbind service:

pi@raspberrypi:/mnt $ sudo update-rc.d rpcbind enable
pi@raspberrypi:/mnt $ sudo service rpcbind restart

I then created a mount point for the media:

sudo mkdir /mnt/media
chown pi:pi /mnt/media
Finally, I added an entry for this mount in /etc/fstab and mounted it:
{IP ADDRESS}:/volume1/Media /mnt/media nfs rw 0 0
sudo mount -a

Plex

Much of the foregoing is based on the excellent tutorial on installing Plex on a Pi from element14. At this point I’m ready to install the various packages:

sudo apt-get install apt-transport-https -y --force-yes
wget -O - https://dev2day.de/pms/dev2day-pms.gpg.key  | sudo apt-key add -
echo "deb https://dev2day.de/pms/ jessie main" | sudo tee /etc/apt/sources.list.d/pms.list
sudo apt-get update
sudo apt-get install -t jessie plexmediaserver -y

I rebooted the Pi and was good to go.

Issues

These aren’t specific to the Pi but just things I encountered.

  • I had created down-scaled “versions” of some of my media for playback purposes. The new Plex found these, but they got commingled with the actual media leading to Plex detecting the wrong audio type (e.g. AAC instead of DTS). The Chromecast refused to play said media. I resolved it by deleting the “versions”, re-matching the media in question, and re-creating the version.
  • I’d forgotten that my setup is a “Double NAT“; to allow remote access I had to pass traffic from my cable modem to my internal router and then on to the Pi.

Featured image by Sven.petersen (Own work) [CC BY-SA 4.0], via Wikimedia Commons.